
For those of us that read the Windows Recovery post and thought to ourselves, “Well, Paul, Windows is a no brainer, you can use this program, this program, plus the ones you named and then some”, you’d be right. Windows is an easier operating system, not because it’s been around longer but because it was designed from the ground up to appeal to the common consumer. If you chose Linux, then you’re a minority when it comes to the world of computers.
This isn’t to say this is a bad thing. If we all used Windows 7, we’d all be infected with all the same loophole being unpatched, the same goes for any system really. However, with Linux, to recover important data, we must cross a bridge that many newbies fear: the use of your terminal emulator. So let’s start with the very basics that you’ll need before you can undertake file recovery in Linux. Keep in mind that my recommendation here will work with every operating system out there, not just Linux.
I’m going to make this process as simple as possible, as it can be a very complex operation, however, it doesn’t mean it’s impossible. It means it’s harder then it’s Windows’ counterpart. Rather the install the programs on our official operating system, I’m going to provide a lesser known liveCD that I keep a copy in my CD toolkit that I take everywhere I can. The name of the CD is RIP Linux which is short for Recovery Is Possible, and it’s name covers exactly what we need it for: recovery of lost data and partitions. I have used it a grand total of three times, and while I’ve not used it very often, I can assure you, once your data is recovered, you won’t want to pay for a recovery system again.
Once you download and burn RIP to a disk, you’ll reach the boot menu. If you’re using a 32 bit operating system or a 64 bit system, it is supported, and it has the option to start the graphical shell directly by selecting the “Boot Linux System to X!” option.
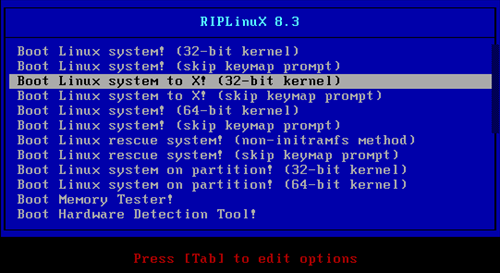
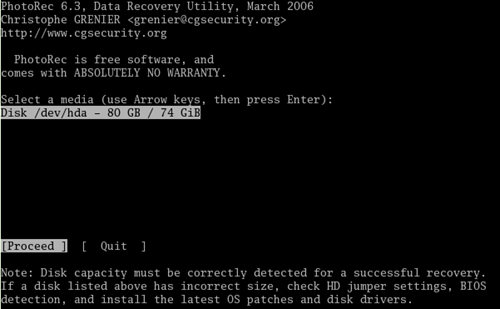
Once there, RIP uses a OpenBox shell, which means you need to right click to open the menus. Once at the desktop, right click and open up XTerm. This will drop you into a terminal prompt. Once there, type in ‘photorec’ if you’re trying to recover file types, or ‘testdisk’ if you’re trying to recover a whole partition. Once into the program itself, it is insanely easy to understand. Select the disk you’re trying to recover data from (if you’re not sure, right click off of the XTerm, open PCManFM which is under Applications, then File Manager, then under the mnt folder, you can explore both of them).
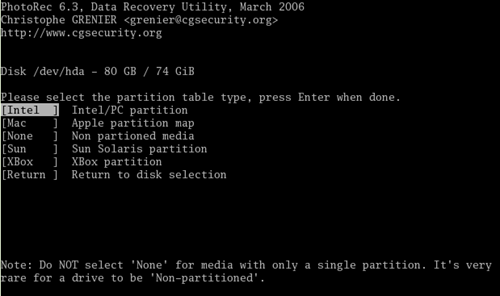
If you’re using a standard computer, Intel is what you should select, otherwise, it’s darned easy to select the right one.
Once we’re past that, and it asks the partition that we are trying to recover data from, we can select the certain partition, or we can hit the “No Partition” selection. Once at this stage, we have to select where to recover to. Remember that MNT is the folder which houses the rest of our mounted drives and we can not recover data to a hard drive we are recovering from. Once you select a different spot to recover it to, hit Y, then let it recover all the data it can. As it recovers data, it will output it onto the screen for you to see, but whatever you do, do not attempt to do anything else, or you risk killing the data recovery.
Overall, it seems to be a lot of work when compared to Windows based recovery programs, such as Recuva, but as powerful as Windows tools are, I’ve recovered more data that I had lost forever with RIP then any other tool ever, including Hiren’s Boot CD (which uses often times an older version of PhotoRec). If you’ve lost data, and you’ve tried Recuva and Roadkil’s RawCopy to no prevail, RIP might just be that one last tool to try before you give up.
–RIP Linux (93mb)-
Related posts:


User forum
0 messages