How to Test RAM with Windows Memory Diagnostic Tool
Unfortunately knowing when you have RAM memory inside your PC that has developed problems isn’t as straightforward as you might think. It can manifest itself in many different ways and problems with your computer which don’t seem in the remotest bit connected with RAM, could in fact turn out to be just that.
A computer that fires into life and then sits at a black screen and doesn’t do anything else is a common symptom of a bad module which needs taking out or replacing. A Windows install that keeps failing while unpacking files from the disc could also be due to a memory error. Even problems relating to disk read errors which sound the furthest thing from memory issues as you could imagine, can be caused by errors coming from the memory.
Testing your RAM for errors is something you can easily do because there are a few free tools around that can help you out, and all that’s needed is for you to run the program and let it check all your internal memory. Here’s a few different ways you can test your RAM for errors.
1. AIDA64
This hardware detection engine is a very popular RAM diagnostic tool. AIDA64 provides a detailed analysis and real-time monitoring of your computer’s hardware and provides a benchmark for measuring the RAM health or the entire system. Additionally, the software is compatible with all 32-bit and 64-bit Windows devices.
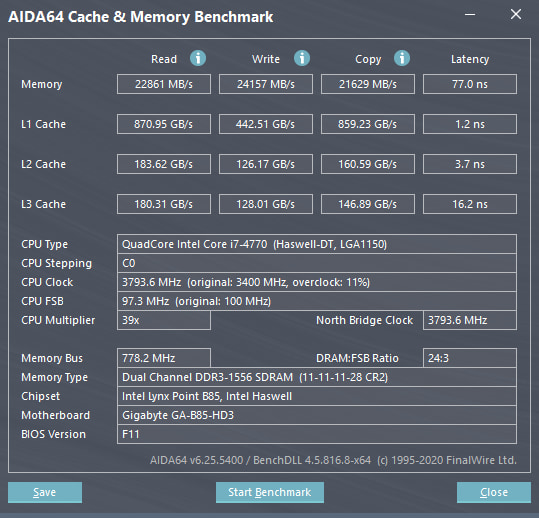
To perform a RAM test, download and install the application. The application provides a very detailed analysis showing the CPU core speed and other details about the mainboard, SPD, and Graphics. On the homepage, select Cache and Memory Benchmark to run the test.
2. Microsoft’s Windows Memory Diagnostic
This Microsoft memory testing tool is a bit old coming from 2003 but because the method of testing memory is the same today as it was back then, it still works. While being quick and easy to use, the diagnostic includes a comprehensive set of memory tests and a number of advanced options for the more experienced users.
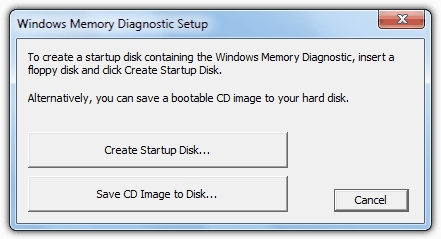
The tool downloads as an executable, and when you run it, you’re given the choice of creating a bootable floppy or an ISO image that you can then burn to a CD.
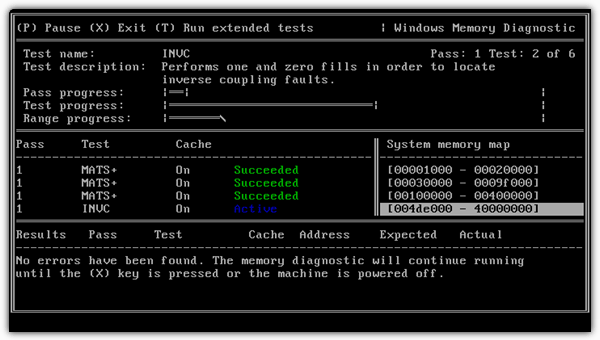
Simply boot from the created disc and the tests will begin automatically. This will take several minutes to complete and time depends on the amount and speed of the installed memory. Any errors that might appear mean there are potential problems reading the memory. Letting the tests complete 1 full cycle should be enough to determine if there are any problems.
Pressing “P” to pause the test and then “M” will show the advanced menu where you can change the tests performed, alter the cache settings, and also choose to show errors by memory module which will help identify the RAM module at fault if you have more than 1 installed.
There is one limitation to the Windows Memory Diagnostic utility which is it only scans the 1st 4GB of any installed memory and anything above that will be ignored.
Download Microsoft Windows Memory Diagnostic
3. Memtest86+
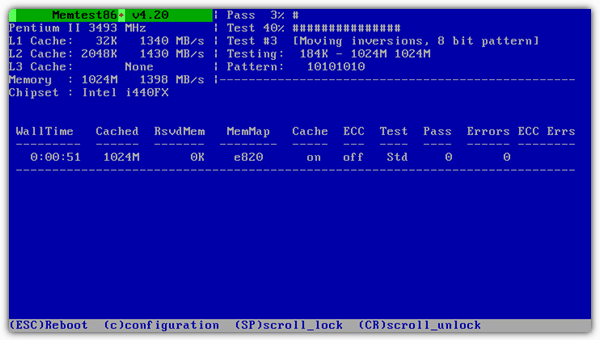
This open source memory diagnostic tool is a branch from the original Memtest86 and is probably the most used free memory testing program around today. There is support for most of the latest hardware and this tool is known to be one of the most accurate and robust at detecting memory errors.
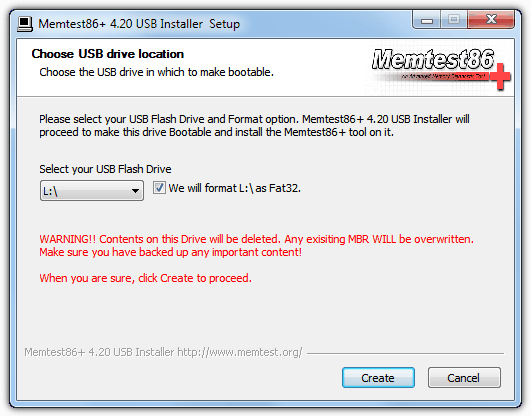
Memtest86+ can be run on your machine three different ways; from a bootable floppy disc, a bootable ISO image which you can burn to a CD, or perhaps the most useful option for today’s PC’s is an executable installer that writes Memetest86+ directly on to a USB stick.
Like the Microsoft memory diagnostic tool, the time Memtest86+ takes to complete the test depends on your hardware specification and usually 1 full pass will be sufficient to detect any issues. Pressing “C” brings up the configuration menu from which you can select specific tests, memory range, and an ECC memory mode,
For those who don’t want to waste a whole CD or use a USB stick just for Memtest86+ because it’s only a few hundred KB in size, you’ll be pleased to know it’s included in the popular Hiren’s BootCD.
4. Windows Vista and 7 Built in Memory Diagnostic
This memory testing tool is not quite as comprehensive as something like Memtest86+, but is useful enough to get a fair idea if you have serious memory errors. It’s readily available in Windows Vista and 7 and users can invoke the tool in 1 of 3 different ways.
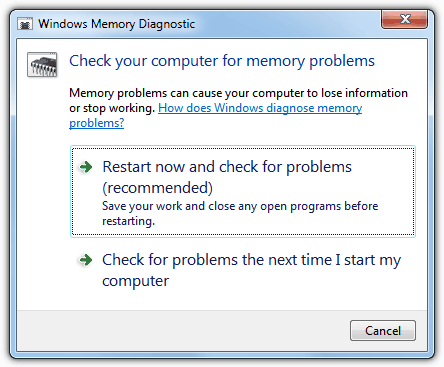
#1 If you’re already in Windows, go to Start or press the Win key and type mem into the search box. The Windows Memory Diagnostic Tool should show in the results, and you can then run it by pressing Enter. A window will pop up asking if you want to reboot now and run the tool or run the tool at the next reboot. Simply choose your preferred option and the next time windows boots it will run the diagnostic test.
#2 If you’re not in Windows, the next time you boot press F8 after the BIOS screen to get to the Advanced Boot Options (Safe Mode selection) screen. Press Escape and then the Tab key to select “Windows Memory Diagnostic”, then press Enter to start the test.
#3 The Memory Diagnostic is also present on the Windows DVD and the System Recovery media disc. It’s available from the System recovery Options window and is the same tool accessed from in Windows that asks to reboot now and test, or test at next reboot.
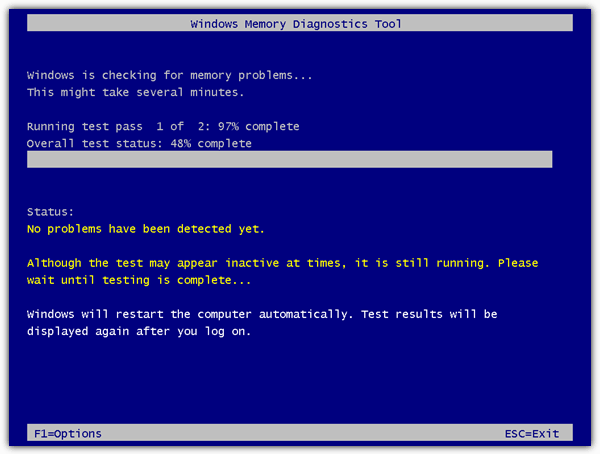
The diagnostic test is pretty quick and defaults to 2 passes, although F1 will take you to the options screen where you can run more basic or more advanced tests, or configure more test passes.


to be cont.d….
YUMI need not installing ! for further help refer :
https://www.raymond.cc/blog/how-to-put-hirens-bootcd-on-flash-memory/
it will provide help & choices.
Hi Friends ,
i want to talk over some concerns expressed here. 1) SanDisk Cruzer Blade USB Flash Drives 8 & 16 GB are working very well . they are coming with 5 year guarantee/ warrantee and i always secure a system image of each of them. 2) why not to use YUMI for making MULTIBOOT drive(s) . one can burn many boot isos on a single drive with it and that too in unlimited sessions ! And we can choose between them from its multiboot menu @ the time of booting. i am frequently running Vista installer, Macrium Rescue Iso, Hiren bootcd iso and Memtest86+ from it and would run several more ! one can also remove/uninstall selected iso(s) from drive with its own feature. we can always use free space on the drive with some care. one should format drive only for the first time and (i would advise to) stick with YUMI’s single version (on a single drive). its compatibility and choice menu is great with direct download links from within (but i won’t use those links and would prefer links provided only @ this great platform RAYMOND CC ) . one can install Windows XP, Vista, 7,8,10 with it and many more. you can also have UBCD with it. 3) As for memtest86+ with YUMI : go for the download ”Pre compiled bootable binary (.zip)” and install it on the USB drive with it.
(sorry much has been on YUMI)
Regards,
Vineet Garg.
“For those who don’t want to waste a whole CD or use a USB stick just for Memtest86+ because it’s only a few hundred KB in size”
Ehm.. what? You can use the free space on the USB stick for whatever you want after making a Memtest86+ stick out of it. Just don’t delete the files the installer created on it. Simple.
Or just use a stick that’s too small to be of any use nowadays anyway.. I’ve got an ancient 64MB ex-promotional USB stick for memtest86+ and a 512MB USB stick that boots a pure DOS with a metric f*ckton of utilities for various tasks (including BIOS flashing utilities for motherboards/videocards, EEPROM programmers etc.)
PS: yes, the email address I entered is valid.. just in case you’re wondering if it’s spammy :P
You seem to be over analyzing the sentence, we’re simply making you aware that Memtest86+ is already on Hirens Boot CD along with a ton of other useful tools so you don’t have to format your USB stick or burn a tiny ISO to CD for a working Memtest.
Small (256MB or smaller is best, I’ve heard) USB sticks succeed where larger ones fail: BIOS flashing/BIOS recovery mode. I guess it’s a problem similar to some Kyocera Androids and >32GB SD cards, in that some developer was a few beers past Ballmer peak and used a signed int where he shouldn’t have.
Also, Memtest86 v4.3 and Memtest86+ v5.01 are available on Ultimate Boot CD (UBCD). Hiren’s hasn’t been updated since 2012.