6 Ways to Get Windows to Auto Sync Time on Startup
6. Synchronize The Clock on Boot With Windows Time
As we’ve mentioned, Windows resyncs the time using a scheduled task once a week which isn’t very useful if you need to resync the clock every time the computer starts. The solution is starting the Windows Time Service on boot which will automatically synchronize the time. This can be done by creating a new scheduled task.
Windows 7 doesn’t have its own time service task to run on boot but Windows 10 already has one built in. Therefore, creating a new task for Windows 10 isn’t really necessary. However, if you are having time syncing issues in Windows 10 and wish to try this method, the steps will be the same.
Create The Windows Time Scheduled Task
Like the Neutron tool, you can create a new scheduled task by importing one we’ve already made although in this case it’ll start the Windows Time Service, sync the time and then the service will stop again upon completion.
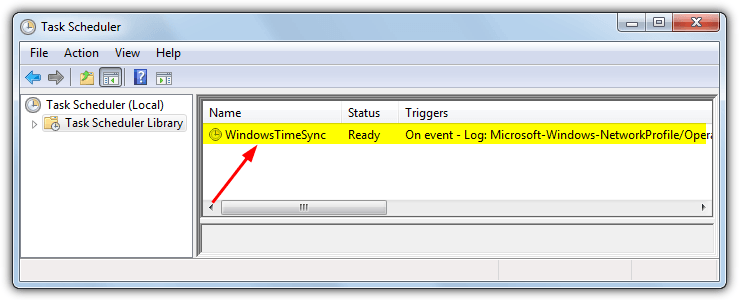
To do that, download WindowsTimeSync.zip and extract it. Run the Create_WindowsTimeSync_Task batch file making sure to right click and Run as administrator if you don’t have full privileges. A new task called WindowsTimeSync will appear in Task Scheduler which will run whenever you boot or manually enable the network adapter.
A drawback of using the Windows Time service is sometimes the Internet Time server fails to synchronize the clock. Third party tools we’ve mentioned in this article solve the problem by automatically attempting to sync with another server when the default fails but Windows Time will just fail if it cannot contact the default time server.
Windows Time Sync Errors and Required Checks
Although the sync on boot scheduled task might work smoothly, there are some system settings you might need to check for it to work correctly. There’s also a common error message you might need to rectify.
Fix The Time difference Is Too Great Error
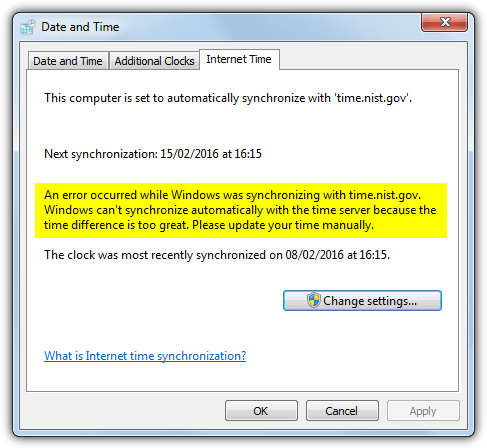
If the clock is out by weeks, months or even years, when trying to sync the time in Windows 7 it could fail. An error might show saying “Windows can’t synchronize automatically with the time server because the time difference is too great. Please update your time manually”.
The error is caused by a hidden setting in Windows which only allows the clock to resync when the time difference is less than 15 hours. Increasing this to something bigger requires two settings to be edited in the registry called MaxPosPhaseCorrection and MaxNegPhaseCorrection. Their default hexadecimal values are d2f0 (15 hrs), changing to a larger number such as FFFFFFFF (35 years) lets the time sync work.
To make things as easy as possible and to avoid editing the registry yourself, download this ready made reg file and run it to make the changes in your registry.
Make Sure The Windows Time Service is Not Disabled
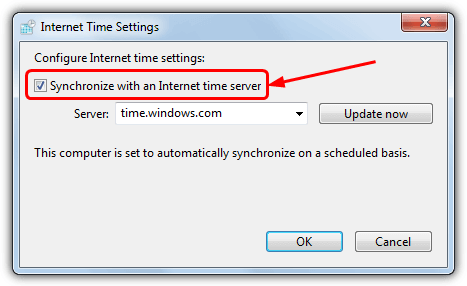
In order for the Internet Time task to work you have to make sure the service itself is not disabled, which it will be if Internet Time is not set to synchronize once a week. To make sure, go to Control Panel > Date and Time > Internet Time tab > Change settings and make sure “Synchronize with an internet time server” is checked. Click OK to confirm.
Make Sure Your Computer Has The Correct Time Zone
Besides syncing the clock to the right time and date, another important setting in Windows is to have the right time zone. If you live in Europe for example, and the time zone is set to the USA your clock could be out by as much as 10 hours. Making sure you have the correct time zone relative to your location will solve the problem.
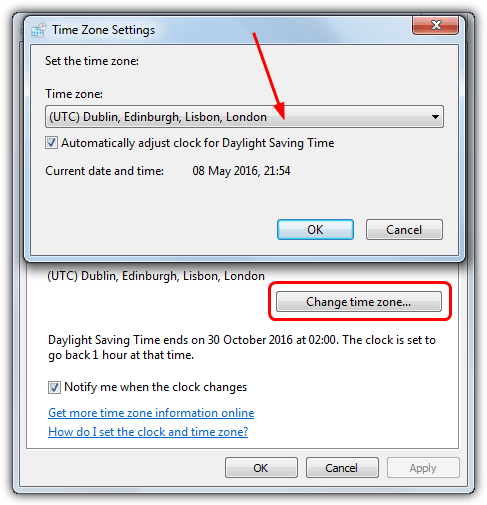
Right click on the clock in the tray and select Adjust date/time, Windows 7 users will need to additionally press the Change time zone button. Click on the drop down and find the right time zone for your area, also make sure the daylight saving time option is enabled if your country uses DST.
Using a More Reliable Time Server
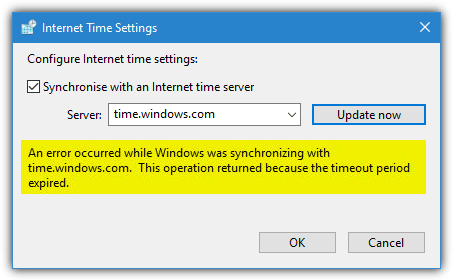
As the Windows Time servers supplied by Microsoft are not 100% reliable, it’s possible to get server not responding or timeout errors. This is more likely if you live outside the United States as all the Windows time servers are US based. For a more reliable time server, it’s best to use one closer to where you live. This is recommended for all versions of Windows as they use the same time servers, including Windows 10.
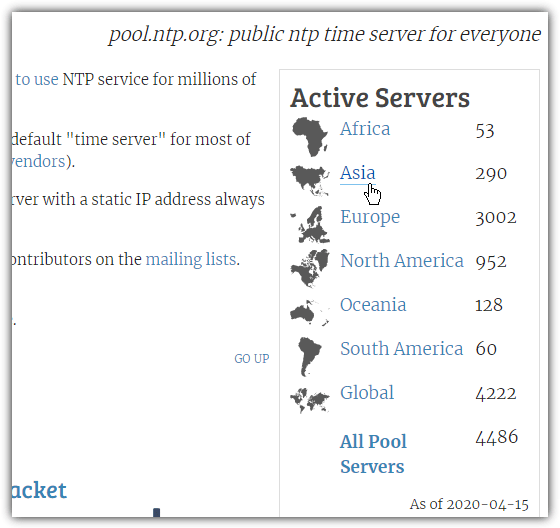
The NTP Pool project is a service with over four thousand time servers available worldwide. The generic global address of pool.ntp.org works for everybody and will try to sync with a server in your local area. However, it’s preferable to manually choose closer servers to you if possible.
a) Visit the NTP Pool Project website and click on the link for your region on the right of the page in the active servers list.
b) Inside the region page, locate your country or the closest country to you and check how many servers there are in brackets. If the server number is small (low single figures), try to choose the next closest country with a higher number. This is simply for fallback purposes and if one server fails, there are plenty of others available to try. Note down the server address (xx.pool.ntp.org).
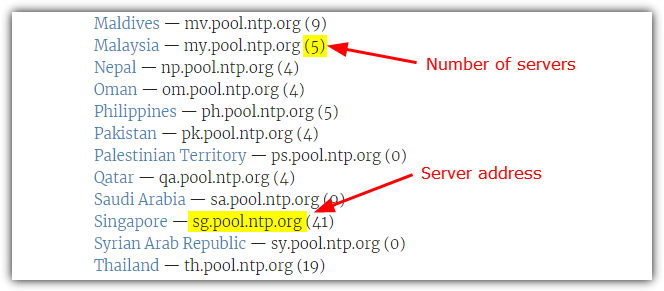
It’s also possible to use the regional time server listed at the top of the page next to the region name. For example, europe.pool.ntp.org, north-america.pool.ntp.org, or asia.pool.ntp.org.
c) To change the default time server in Windows to an NTP Pool server go to Control Panel > Date and Time > Internet Time tab > Change settings. Ensure the Synchronize option is checked and enter the Pool server address into the box, then click OK.
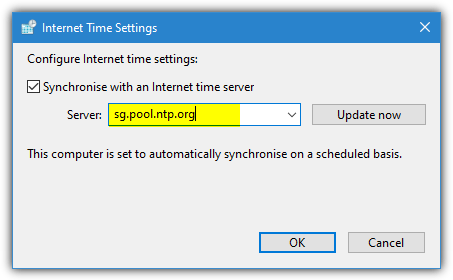
When Windows tries to sync the time according to the schedule or by pressing the Update now button, local NTP Pool servers will now be used to sync from instead, which should be faster and more reliable causing fewer errors from the Windows Time service.
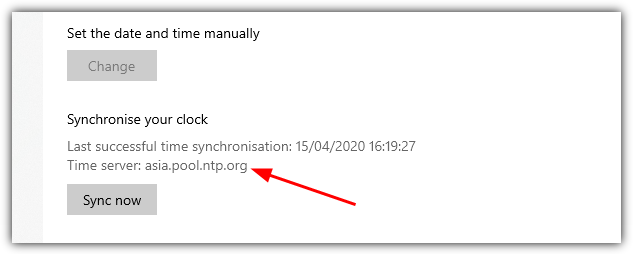
In the Data and Time Settings in Windows 10, the Time server will change to the time server you added in Control Panel.

Coming from Linux it’s painful to see that windows has no native way to keep DST in check, having to install third-party tools however (yay for open-source) seems not of this time moreover expecting this to work assuming the maturity of the OS. Will reboot to my good ol’ Linux set-up in 3, 2, 1…
@echo off
net start W32Time
W32tm /resync /force
echo Sync Successful
copy and paste the above in notepad -> Save it as filename.cmd -> Right Click on this File and Create Shortcut -> Right Click on the Shortcut file -> Click Properties -> Click Advanced -> Check the box Run as Administrator ->Click Apply -> OK
Copy the shortcut file to the Desktop and double click it after startup (NOTE ! You need an active internet connection)
That method obviously does work but it defeats the object of the exercise, which is to sync the clock on startup automatically.
It could be placed in the startup folder (if you don’t use UAC) or adapted to run as a scheduled task but would still fail if it runs before an internet connection is established.
Great script for someone from dos back ground
Would be nice if there was something that could change the time to any preset time(s), by the click of a button, and then set it back to correct time on the Click of a button. Useful for software programmers & developers. Admittedly, probably not too useful for the computer Layman. Didn’t find what I was looking for, but did get some great information. Always a Very useful, helpful Site.
Hi everyone!
I wrote another time synchronization program.
It’s free and open source. Hope you find it useful.
Download: synthcode.net/timeupdater
still not working on windows 10
It would be a bit more helpful if you said *what* for you is still not working in Windows 10. All these methods were tested in Windows 10 at the time of writing and worked fine.
I need a program that adjusts the clock automatically every 5 or 10 minutes. Could you recommend one, please?
NetTime can adjust on a custom timed schedule, just set the number to 5 or 10 and set to minutes in the drop down, look at the image and the Update Interval option.
Dimension 4 can also do it, Time-Sync has options for 1 or 30 minutes.
Many tanks Raymond,
needed a quick end effective solution and as usual found it here.
As a long time user of “Dimesion 4” on XP, without problems, searched for an up to date alternative,
“Time-Sync” has done the job.
Yes I know, shouldn’t be so lazy and go get a new battery.
Thank you very much! The Pool.ntp.org works for me. (^_^)
thanks! It’s good experience
time-sync works d4 doesnt work,neutron sync when you click but 1 hour ahead of real time.
I tried change the time manual to see how it will be adjusted and it took just one second for time -sync to adjust
D4 works fine and we still use it here sometimes. If you read the article, we explain the Neutron 1 hour issue and how to fix it.
Thanks man. The ntp servers work perfectly with widows too apparently. Thank you again.
hi desktop dell optiplex3050 time and date always change after power off i do any troubleshooting but not working
What about Meinberg NTP??? Come on
Hi
Time-Sync is best app and works perfectly
Thanks raymond
NetTime is another perfect tool to sync time…
timesynctool.com
Create_WindowsTimeSync_Task.bat does not work in Window 7 Home Premium:
*** Create WindowsTimeSync Scheduled Task by Raymond.cc ***
ERROR: Invalid argument/option – ‘Time’.
Type “SCHTASKS /CREATE /?” for usage.
Press any key to continue …
Just tried it myself on both Windows 7 Home Premium 32bit and 64bit, works fine and as intended. Must be an issue local to your system.
kindly sent link for windows timesync
Well, or you use the comfortable PTBSync, which does not only adjust your clock when a user is logged in. The backgound service does this also without user (optimal for servers) You can enter 2 time servers. If one fails the other one is taken. For people behind a firewall which blocks NTP port 123 you can even sync with a HTTP time server. Additionally you have a configurable Desktop calendar, which displays the current weather, a scheduler and a configurable trayclock which may show seconds. Strange that this program is missing here. PTBSync is donationware which means that you can use it for free but you are asked to give a donation to an ONG for using it. Description with serveral screenshots here: netcult.ch/elmue/ElmueSoft-en.htm
thank you valuable article after hour of searching!
Thank you for the article. I downloaded Neutron, made a shortcut on the desktop, changed the shortcut with the small program UACpass, and put the new shortcut in the startup folder. This works fine on my Win 7.
My english is poor but i try to text my problem
i have problem in my pc cmos bettery holder or in motherboard. when i restart my pc date is 1 1 2005 then my some software like 3dsmax, corel draw ,etc have some error ….and my pc not have internet connection and not connected any network pc …can have utility that custome time in boot ….i dont want to sync exect date or time …..can have any utility that custome time in boot and fix date start like when i start time like 01 01 2015. ….have software?
Neutron works like a charm.
Thanks a lot.
Personally, I just create a Windows Task:
%windir%\system32\sc.exe start w32time task_started
%windir%\system32\w32tm.exe /resync
Runs at 1:15am every day and makes sure time stays in sync using built in Windows NTP client.
Great advice…. assuming i could get omline,whch i cant.
Thanks for all this, but I downloaded the batch file NeutronTime_Task.zip and extracted it to create the Neutron Time task. It creates the task in the task scheduler, but every time I reboot the computer, the task disappear. I don’t really understand why, if someone can help me with this..
A scheduled task should not disappear during a reboot after it has been created. Are you running some sort of security software that is watching the tasks?
I have Avast Premium and I run BoostSpeed 9, but I don’t anything else that could interfere with the task. I also had Unchecky that I have uninstalled who was running from the start. Could it be that because i created a scheduled task of synchronizing the time every day that the system deletes the Neutron task? I don’t really know what to do.
Once the task is created and you can confirm it’s present in Task Scheduler, the task will not be deleted by Windows itself, something else must be removing the entry. It won’t matter if you are using Windows Vista, 7, 8 or 10.
You can always use the other method of placing a shortcut for Neutron in your Startup folder if the task is giving you so much trouble. We like the task method but it’s not the only way to run Neutron on boot.
Thanks for reminding me of the method of the startup folder, I had forgotten about that one! It will be much simpler and I don’t think it will be deleted. I hope so that it will stay there! Thanks.
Thanks for the useful articles, as for additional info, I have using CMDTIME to solve bios clock reset, seems the motherboard issue instead of battery since i have try to replace the battery but the problem still persist. I simply put this small cmdtime batch file to windows 7 64 startup, as long as you have internet connection it will work like charm. Please check it here autohotkey.com/board/topic/2618-synchronize-clock-with-internet-time-servers-at-startup/
In my experience w32time will not sync the time on the first attempt, because the time sample usually is “stale” (as reported by w32tm cli tool). To solve this, I ran a batch file which invoked w32tm /resync three times with pauses of 4-5 seconds, or alternatively set the SpecialPollInterval very low initially, and then changed it to normal. Interesting trigger for that task scheduler. I figured I could ping an IP to wait for network to become available instead. This also works on XP. To keep the service running on Seven I deleted the scheduled task that already existed.
Disappointingly, on XP I received no clear description of the error either in control panel or in the event log, until after after one poll interval had elapsed. Understanding and configuring W32time is just like NetBIOS shares, where the only feedback Windows gives is “access denied” after a loong delay…
Thank you for the link to Dimension 4. It is smaller than Meinberg NTP.
Good blog posting as usual Raymond. I run much profitable ecommerce store and I sometime need to process a payment on my personal computer if my portal fails. If the time on my labtop does not match with the payment system the payment fail. It is critical that my time is write so I’m happy for these informations.
Thanks for this post. I installed immediately Neutron on my portable.
very interesting.
D4 user for years.
I have been using Atomic Clock Sync: a free configuration utility for years provided by worldtimeserver.com/atomic-clock/, simple, reliable.
It is indeed a useful tool and we looked at it, unfortunately it has several shortcomings for what we are doing in the article. It cannot auto sync on starting the program, cannot quit once synced, cannot contact any other servers besides time.nist.gov and relies on the Windows Time service (which can be hit and miss).
Remember, the article is not about general or useful time syncing tools, but tools that can auto sync with a time server when starting your computer.
Is there a time server based on http rather than ntp? The proxy server at work seems to block ntp.
Dimension 4 allows you to setup a time server over http, more information on how to do it is in their FAQ:
thinkman.com/dimension4/faq.htm