3 Ways to Modify Windows Route Table to Choose Which Connection to Use

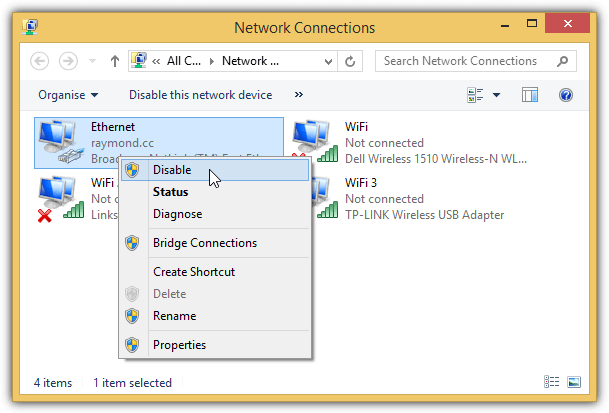
It is common to find two networking adapters in a notebook or in an all-in-one desktop which are a wireless and wired connection. Since both adapters can be simultaneously connected to a router, you might wonder which network connection your computer will use or will it use both at the same time? Obviously having multiple networking adapters connecting to the same gateway is unnecessary because it may cause unwanted routing issues. The best way is to manually disable the network adapter that you don’t want to use from Network Connections in Control Panel.
Some BIOSes on branded computers such as HP have the ability to automatically disable the wireless when a wired connection is being used. This is logical because a wired connection is often more stable than wireless as it is prone to interference. Moreover, there is a higher chance that the wired connection these days has a faster connection speed up to 1Gbps while the fastest wireless speed at 1.3Gbps with the latest 802.11ac standard is hard to achieve.
Even if your computer’s BIOS doesn’t support switching of networking adapter automatically, Windows actually has a built-in algorithm to decide which network adapter to use for best performance. It is not entirely true that there is a rigid rule whether the Ethernet or WiFi adapter will always be used when both are connected to the same router/gateway.
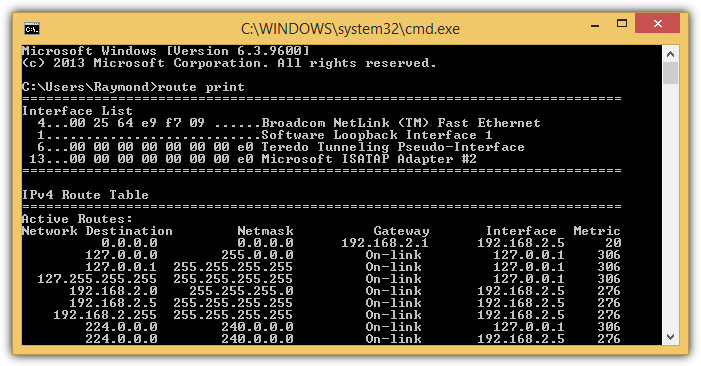
In an IP network, a routing table is a set of rules that determines where the packets are directed to. By typing the “route print” in command prompt, you get to view the route table that contains information such as the interface list, network destination, netmask, gateway, interface and metric.
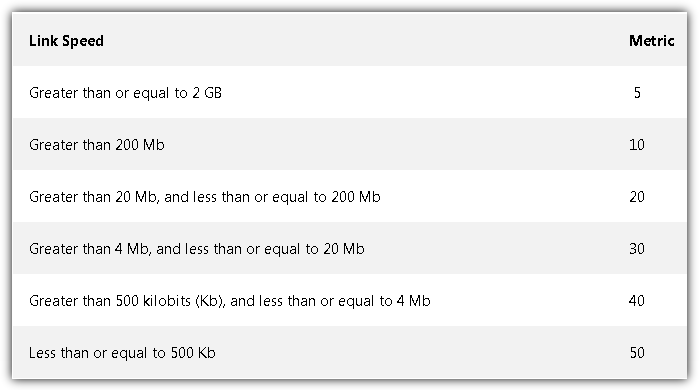
The values in the metric column are the most important pieces of information in a route table. Microsoft has an article that explains the automatic metric feature in Windows and how it assigns the metric for a network adapter based on the link speed, hop count or time delay. Basically a network adapter that has the higher link speed will be assigned a lower metric and the network adapter with the lowest metric in the routing table will be used.
Do take note that only applications that use the Internet Protocol will use the network adapter with the lowest metric. This includes downloading files from the Internet using your web browser, surfing the web, chatting with your friends using an instant messaging program and etc. However, when you are copying files from another computer in a local area network, the metric value is not being used because file sharing on a Windows network uses the Client for Microsoft Networks protocol, not the Internet Protocol.
For a LAN connection, the Ethernet (wired) network adapter will always have priority over a Wireless adapter regardless of metric. For example, when you have an Ethernet connected at 10Mbps speed while the wireless adapter is connected at 100Mbps in the same gateway, Windows will still use the Ethernet adapter to access resources on a local Microsoft network. But when you access the Internet using your web browser, it will use the wireless adapter instead because of the lower metric. As you can see, both adapters are being used together but for different purposes depending on the network protocol.
If for some reasons you do not want to use the automatic metric feature, it is possible to either permanently or temporarily change the metric for the adapter in the routing table.
How to Change the Network Adapter’s Metric
There are a few 3rd party user friendly GUI tools such as Cain & Able, Win IP Config, Routing Table GUI that runs on Java, and HoverIP, that claims to have the feature to manipulate Windows route table but unfortunately most of them don’t work very well in the sense that it only shows the routing table, but is unable to add, remove or modify an existing route. Even if the program has a feature to add/remove a route, it doesn’t work properly. Here we have 3 working ways to change the network adapter’s metric.
1. NetRouteView
NetRouteView is probably the only 3rd party tool that works very well that can even support the new Windows 10. This small and portable tool allows you to easily add, modify or delete route entries in Windows. Do take note that you will need to manually run NetRouteView as administrator to make changes on the route table or else you will get an “Access is denied” error.
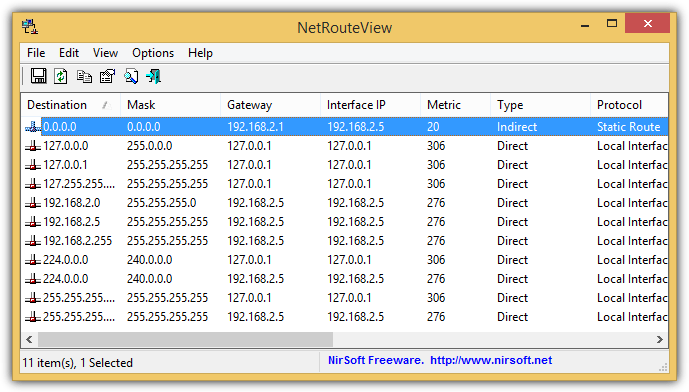
Changing a network adapter’s metric is as easy as double clicking on a route with the destination 0.0.0.0, modify the metric value accordingly and click the OK button for the changes to take effect. However you must remember that you cannot change the metric to a lower number than the original metric due to the method used by NetRouteView in changing the metric.
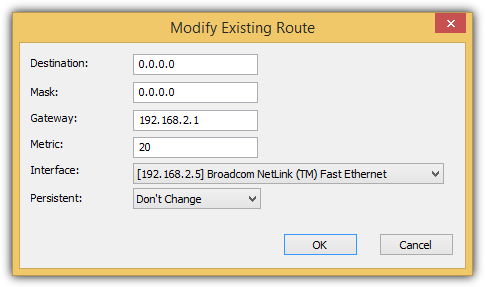
If you want the new metric value to be permanently stored in the IP routing table even after a reboot, you should click on the drop down menu for Persistent and select “Yes”.
2. Route.exe Change
The route.exe tool that is found in Windows can be used to change the metric of an adapter. This is in fact the same method used by NetRouteView to change the metric and has a restriction of not being able to set any metric number you want, especially lower than the current metric.
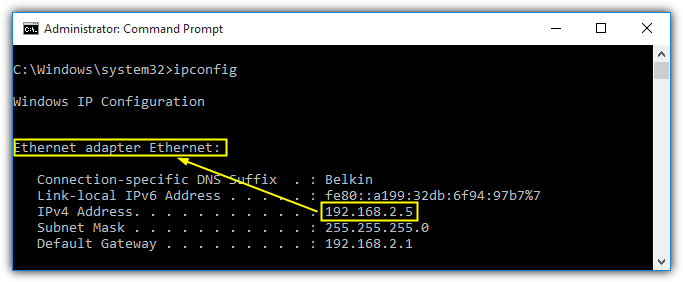
The first step is to launch a command prompt by pressing the Start button, type cmd, right click at Command Prompt and select “Run as administrator”. Type “ipconfig” in command prompt, press Enter and take note of the IP address for the network adapter that you want to change the metric. In our example, the IP for the Ethernet adapter is 192.168.2.5.
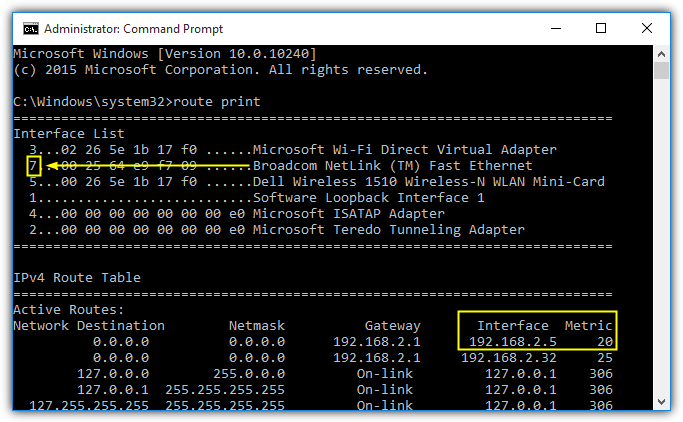
Next, type “route print” in command prompt to get the interface number and also the current metric for the particular network adapter. The Ethernet adapter has an interface number 7 and metric 20.
To increase the metric for an Ethernet adapter with an IP of 192.168.2.5, the command would be route.exe CHANGE (Network Destination) MASK (Network Mask) (Interface IP) METRIC (NUMBER) IF (INTERFACE NUMBER). An example:
route.exe change 0.0.0.0 mask 0.0.0.0 192.168.2.5 metric 5 IF 7
By typing the command above, the metric for the Ethernet will become 25.
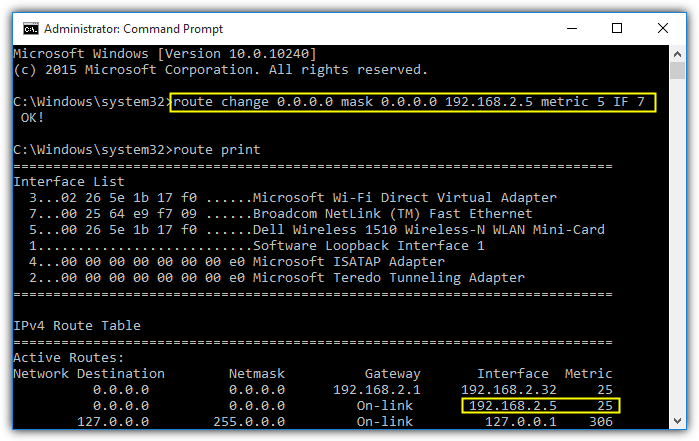
As you can see, the route change command does not replace the current metric with 5 but instead the 5 will be used to add to the current metric 20, making it 25.
3. Custom Interface Metric
This method is different from the above because it disables the Windows automatic metric feature and overwrites the current metric with any number including smaller than the current value. Moreover, this method is a permanent setting that survives the computer reboot. The steps to achieve a permanent custom metric are as follows:
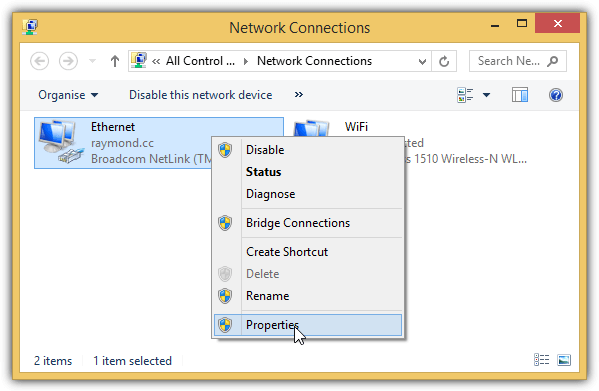
Press the Start button, type ncpa.cpl in the box and click OK. This will launch the Network Connections window listing all the available network adapters. Right click on the adapter that you want to make the changes and select Properties.
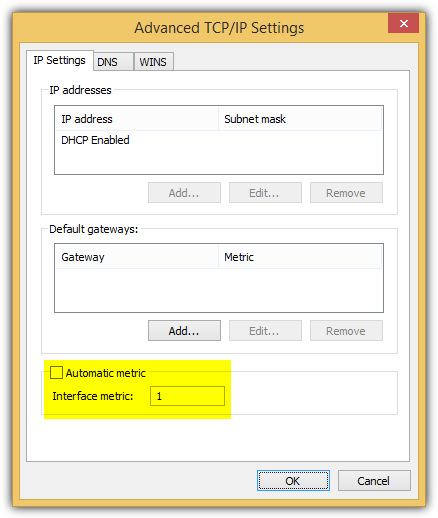
Double click at the Internet Protocol Version 4 (TCP/IPv4) and click at the Advanced button located at the bottom right. The “Automatic metric” checkbox should being ticked by default so all you need to do is uncheck it and input the metric in numbers. If you want this adapter to be used for all Internet Protocol applications, simply set it to a very low number, for example 1. Click OK on all open windows to apply the changes.
The command line below can also be used to achieve the exact same result as above, but you must enter the exact same interface name.
netsh interface ipv4 set interface (INTERFACE NAME) metric=(number)
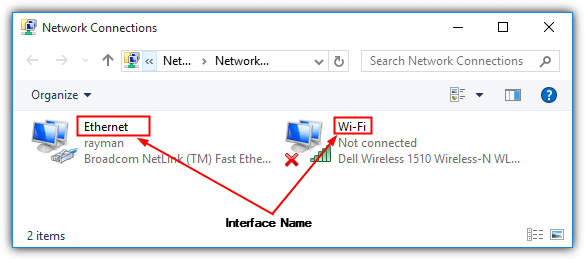
The interface name is the name of the connection which is found in Network Connections (ncpa.cpl). In Windows 7, the wired connection is normally named as “Local Area Connection” while the wireless is “Wireless Network Connection”. As for Windows 10, the default interface name for wired connection is Ethernet while wireless is “Wi-Fi”.
Additional Notes: The new Windows 10 is much smarter in handling multiple connections to the same gateway by ignoring the “Connect Automatically” option and not automatically connecting to the gateway using the wireless when the wired is already connected.
We’ve also tested the order of network adapters found in the hidden “Adapters and Bindings” extensively and it doesn’t seem to have any effect on which adapter is to be used. If you’re interested in trying it out, it is at Network Connections which can be launched by running ncpa.cpl from the Run window, press Alt+N, and finally select Advanced Settings.

Improve this guide

User forum
0 messages