Connect Computers Together using Ad Hoc Wireless for Sharing the Internet and Files

Most people have an internet router at home for connecting to the internet, many will have the added ability of sharing the network via a wireless connection as well. If you have a WiFi router within range it’s quite easy to connect your computer to it for using the internet and sharing files with other computers on the network.
But if you don’t have a WiFi or even wired router close by it becomes trickier to connect two computers together, unless you happen to have a crossover network cable to hand.
These days some cheap laptops are even shipping without ethernet ports so WiFi is the only option for connecting to the internet or another computer for file sharing, and a wired only router simply wouldn’t work. Luckily Windows has the ability to connect two computers together over a wireless connection and even allow you to connect to the internet as well as share files.
Here we show you how to do this easily without the need for extra software.
Ad Hoc Networking in Windows Vista and 7
These operating systems are the best in terms of both creating and connecting to ad hoc networks simply because it’s so easy to do and is entirely GUI based, even inexperienced users can set up networks with minimal fuss. Windows Vista might use slightly different wording or window layouts to Windows 7 but it’s essentially the same steps.
Creating an Ad Hoc Network in Windows Vista and 7
1. Right click either the WiFi or ethernet icon in the system tray and select Network and Sharing Center. Select “Set up a new connection or network”, this will be on the left in Vista.
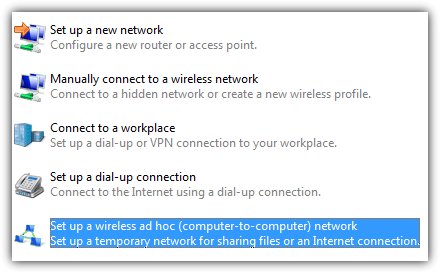
2. Choose “Set up a wireless ad hoc (computer-to-computer) network”, click Next and Next again (read the information first if you wish).
3. Enter the network name (SSID) of your choice, select a security type and enter a password for the network. WPA2 is obviously the most secure and needs an 8 character or more password, WEP is less secure and requires 5 or 13 characters, Open is unprotected and should be used for troubleshooting only. Optionally check “Save this network” to save the wireless profile so it will be available after a reboot.
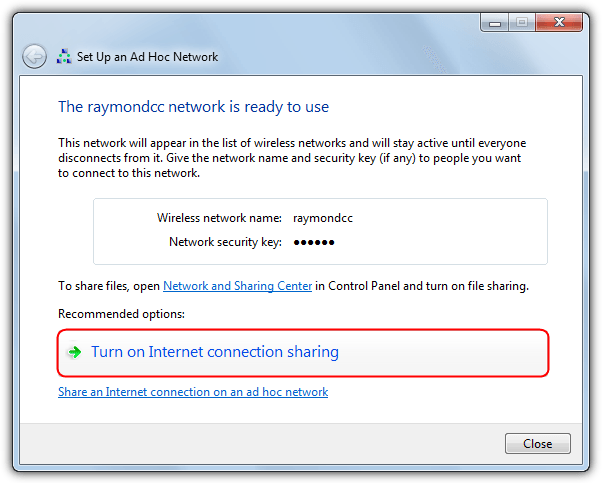
4. Wait a few moments for Windows to set up the ad hoc network. Once finished it’ll tell you that the network is ready to use. There will be an additional option to enable internet connection sharing IF you are connected to the internet via ethernet. If you want to share the internet connection with a connected computer, click “Turn on Internet connection sharing” and close the window.
You can now go to the computer you want to connect to this computer and try to find the network in the list and connect.
Tip: To create an ad hoc network in Vista and 7 that shares the internet from the wireless connection itself (no ethernet is connected), you need to create a Hosted Network, following the guide for Windows 8.1 below will allow you to do this.
Connecting to an Ad Hoc Network from Vista and 7
Finding a computer-to-computer ad hoc network is easy, simply click on the wireless network icon on the tray and look for your named wireless network in the list of available connections. Click on the network you want, click Connect and you will be asked for the password.
If this is your first time connecting to the ad hoc network you will be asked to set a network location of Home, Public etc, simply select which best suits your purpose. Many types of devices should be able to connect to this network including phones, tablets, Mac, Linux etc.
Ad Hoc Networking In Windows 8.1
If you’re running Windows 8.1 the first thing you’ll notice is that a created ad hoc network you want to connect to never shows up in the wireless connections list. You also cannot create a computer-to-computer network in the Network and Sharing Center. For some inexplicable reason Microsoft has decided to disable interface based ad hoc networking in Windows 8.1. Thankfully it’s not completely disabled and creating, viewing, connecting and disconnecting ad hoc networks can still be controlled through the command line.
Creating an Ad Hoc Network in Windows 8.1
The first thing you need to do is check whether your wireless adapter has hosted network support, if it doesn’t you cannot create an ad hoc network in Windows 8.1. To check, type the following into a Command Prompt and check the “Hosted network supported” line.
netsh wlan show drivers
As you can see the old USB adapter we’re currently using doesn’t support hosted network so we can’t create an ad hoc network with it. It’s worth noting that an updated WiFi driver could help make connections more stable and there’s an outside chance hosted network support could have been added as well. If your result says Yes you’re OK and can proceed.
1. Open a Command Prompt window (Right click Start > Command Prompt (Admin)) and use the following syntax to create the network profile:
netsh wlan set hostednetwork mode=allow ssid=networkname key=password
Note the password has to be at least 8 characters long and use your own name for the network instead of networkname.
You should get three lines in the Command Prompt notifying the hosted network has been successfully setup.
2. Start the ad hoc network with the following command:
netsh wlan start hostednetwork
The Network and Sharing Center should now show the new network.
Now go to the computer you want to connect to this ad hoc network and the network name will appear in the list of available WiFi connections. Simply connect like you would to any other wireless network. Don’t forget if you’re connecting from another Windows 8.1 computer you’ll have to manually configure the ad hoc connection because it won’t appear in the list.
Connecting to an Ad Hoc Network from Windows 8.1
First you have to manually create the wireless connection from the Network and Sharing Center and then use commands to connect to it.
1. Right click the WiFi/Network icon in the system tray and choose “Open Network and Sharing Center”, click “Set up a new connection or network”.
2. Select “Manually connect to a wireless network” and enter the credentials for the ad hoc network you are connecting to (SSID, encryption type and password). Untick “Start this connection automatically” and click Next followed by Close.
3. Open an administrator Command Prompt by right clicking Start > “Command Prompt (Admin)”, enter the following to tell the profile it’s an ad hoc connection.
netsh wlan set profileparameter networkname ConnectionType=IBSS
Replace networkname with the Network name (SSID) entered in step 2.
4. Type the following to connect to the network, again replace networkname with the SSID:
netsh wlan connect networkname
A success message will be displayed. At this point the WiFi icon in the system tray should light up to show a connection, in the Network and Sharing Center your new ad hoc network should be visible.
5. To disconnect from this network you either have to reboot/shutdown the computer or type the following into Command Prompt.
netsh wlan disconnect
If this was a one time connection the profile can be deleted from the system with this command:
netsh wlan delete profile networkname
Alternatively go to PC Settings > Network > Manage known networks, click the network you want to remove and press Forget.
Tip: If you wish to connect to this ad hoc network more than once, simply create a shortcut on the desktop and use the “netsh wlan connect” command from step 4. You can also create another disconnect shortcut as well. Then simply use the shortcuts to (dis)connect the network.
Allowing Connected Computers to use the Internet
If the computer where you’ve created the hosted network has access to the internet via ethernet or WiFi, you can set the ad hoc connection up to allow the connected computer to share the internet.
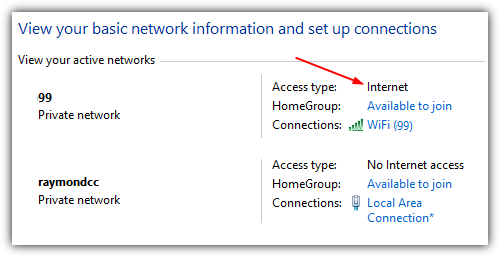
1. Open the Network and Sharing Center by right clicking the network tray icon and look for the name of the adapter in the active networks list that has the Access type of Internet.
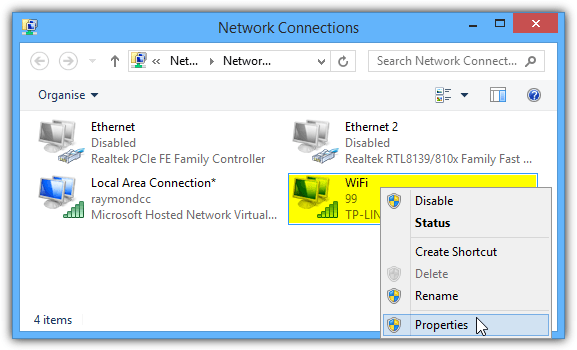
2. Select “Change adapter settings” on the left, right click on the network adapter that had the Internet Access type in the previous step and click Properties. This could be a WiFi or ethernet connection.
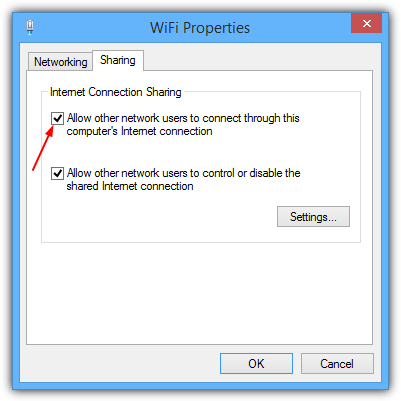
3. Click the Sharing tab and tick the box for “Allow other network users to connect through this computer’s internet connection” and click OK.
Your computer has now been turned into a WiFi hotspot with internet capability! It’s also possible to tether other wireless devices such as smartphones and tablets to the ad hoc network so they can also use its internet connection.


Improve this guide

User forum
0 messages