5 Ways to Show Administrator Account on Windows Logon Screen

In addition to the standard and administrator accounts created by users on a Windows computer, there are also other accounts that are built in by default. The Guest account can allow other users that don’t have their own account short term limited access on the system. Then there’s the built in Administrator account which is similar to a regular administrator account. The main difference is by default it has no permission restrictions imposed by User Account Control (UAC).
While the built in administrator is an account you could potentially use every day, it is certainly not recommended you do that. It should only be used in an emergency when you need to troubleshoot or repair other system accounts, then be disabled again. This will reduce possible security risks by leaving it active. Although the administrator account was enabled by default in Windows XP, it has been disabled by default in every version of Windows since Vista for increased security.
Here we’ll show you several possible ways in which you can enable the built-in administrator account. Methods for Windows Vista, 7, 8.x, 10 and also XP are included. Please remember that the administrator is for temporary use only and should be disabled as soon as you have finished with it.
Enable Administrator Account in Windows Vista, 7, 8 And 10
Because back in the days of Windows XP the built in administrator account was enabled by default, all you had to do was access it. In Windows Vista and above it has to be enabled first before it becomes accessible on the logon screen. This can be done several different ways.
Enable Administrator From Computer Management
This method of enabling the administrator account is probably the easiest and can be achieved in as little as just 9 clicks of the mouse.
1. Right click on Computer/This PC on the desktop and select Manage. Alternatively open Start and type compmgmt.msc.
2. Expand System Tools > Local Users and Groups > Users
3. Double click on the name Administrator and uncheck the “Account is disabled” box.
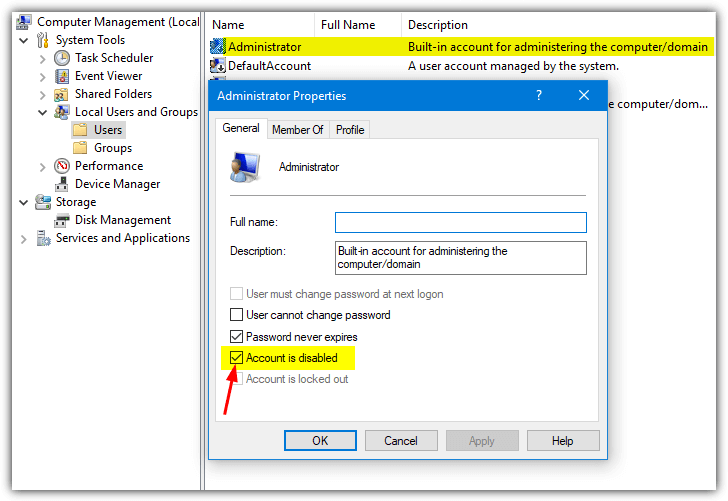
4. Click OK to save the changes and restart your computer or log off.
Enable Administrator Via Security Policy
Group Policy and Security Policy consoles are not available in Home or Basic versions of Windows, those users will need to use one of the other options.
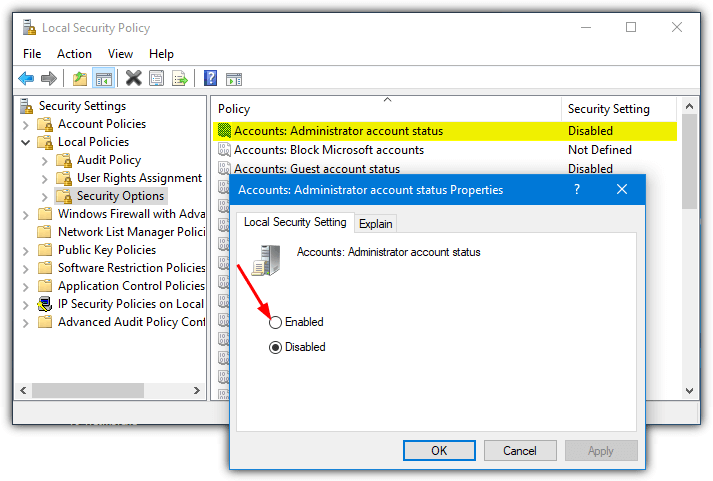
1. Open Start and type Secpol.msc to open the Security Settings snap-in.
2. Expand Local Policies and click on Security Options.
3. In the right pane double click on “Accounts: Administrator account status” (should be the top option). Click the Enabled radio button, press OK and close the Security Settings window.
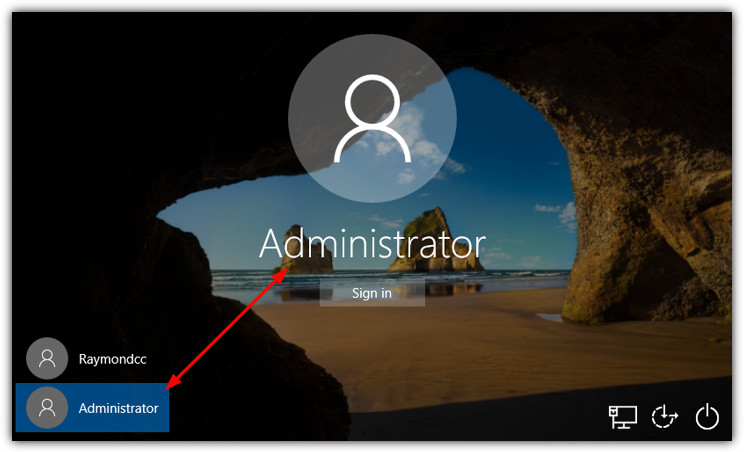
When you next reach the logon screen the administrator account will be visible.
Use The Net Command To Enable The Administrator Account
Using a built in Windows command is probably the most flexible way of enabling the administrator account. This is because you can use it from Command Prompt, from batch scripts, from within your own programs (see below) or even when you are unable to log in to Windows from another account.
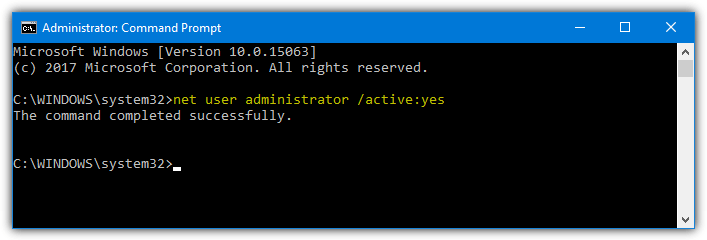
Open an administrator Command Prompt (or admin PowerShell) and type the following to enable the administrator account:
net user Administrator /Active:Yes
You can also use “/Active:No” to disable it again from the command line. If you would like to enable and also password protect the account at the same time (recommended), use:
net user Administrator “mypassword” /Active:Yes
To make things as simple as possible we’ve created three very small batch files (only 3 lines each) which will enable, disable or enable the Administrator account with password. Download the Administrator_Accounts Zip file, extract it, right click and run the batch file you want as administrator. Open the password account script in Notepad before running it and edit the “changeme” to your preferred password.
Any access denied message while using these commands or batch files means you haven’t run the Command Prompt or script as administrator.
Use A Third Party Utility To Enable The Administrator Account
If you don’t want to mess around in Command Prompt or management and security consoles, there’s an option to enable the administrator account in a third party program. The program in question is the great little tool Winaero Tweaker.
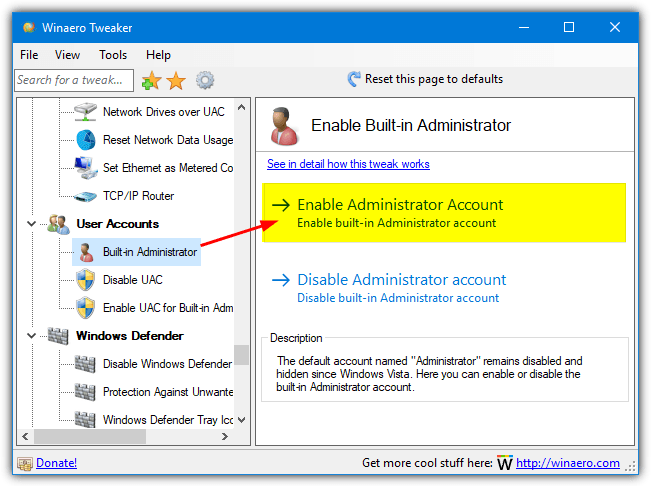
Download and run the installer and you have the option to create a portable version if preferred. Open the Winaero Tweaker program and go to User Accounts > Built-in Administrator in the options tree on the left. Simply click on “Enable Administrator account” in the right hand pane and close the program. The .NET Framework 3.5 needs to be installed if you have Windows 8.x or 10.
This program uses the exact same method to enable the administrator as above. The command “net user administrator /active:yes” is run in the background in a hidden Command Prompt.
Display Administrator Account on Windows XP Welcome Screen
WIndows XP is long out of Microsoft support but it’s still used by a sizeable proportion of users so we’ll include the option. The difference between XP and all newer versions of Windows is the Administrator account is already active. Pressing Ctrl+Alt+Delete at the welcome screen twice will open the classic logon where you can simply type “administrator” as the username and log in.
If you would like to have the administrator account appear as an icon on the welcome screen along with other users so it can be selected at a click, there is a simple way to achieve it.
A very old tool dating from 2002 called Add Administrator/Welcome Screen will do the job. Just run the program, check the “Enable Admin Account on Welcome Screen” box followed by clicking on the Apply button.
Download Add Administrator/Welcome Screen
You can also achieve the same result in XP by using one of the third party tools in our article about how to hide specific user accounts from the logon screen.
Enable The Administrator Account While Not Logged In
If you are having issues with your account, such as forgetting the password or profile corruption so it won’t start, the administrator account becomes very useful. There are a couple of ways to achieve this offline although the following method has a few advantages, like being able to change or reset passwords and run other tools such as Regedit before anyone logs in.
The main requirement is to be able to move a couple of Windows files while Windows itself is not started. This can be done with utility repair disks like Hiren’s BootCD, Gandalf’s WinPE or with a Live Linux distro. We are going to use a Windows installation DVD for the task.
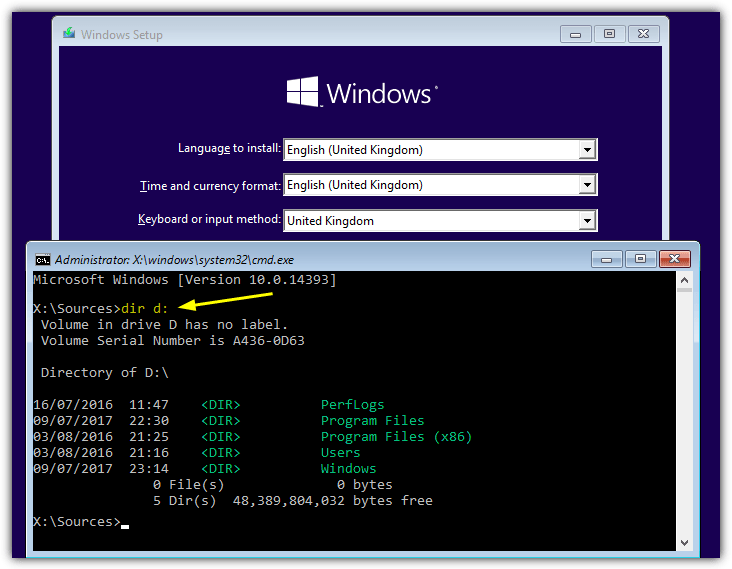
1. Boot to the Windows installation media and press Shift+F10 to open Command Prompt when you reach the select language, time and keyboard screen.
2. Type Dir D:, if it lists the Program Files, Users and Windows folders, you have the right drive letter. If not, try other Dir commands such as Dir C:, Dir E: etc until you find the right drive that shows those folders.
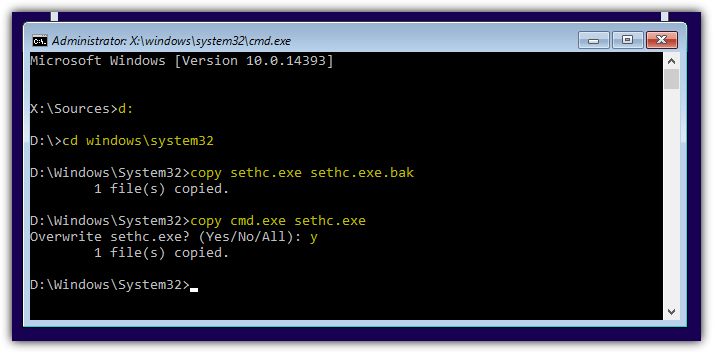
3. Type these commands in order, change the drive letter from D: if you found an alternative drive letter in the previous step.
D:
CD Windows\System32
Copy Sethc.exe Sethc.exe.bak
Copy Cmd.exe Sethc.exe
Press Y when asked to overwrite the file.
4. Close the Command Prompt and then the setup window to force a reboot. Once you reach the logon screen press the Shift key 5 times (or press Alt+Shift+PrintScreen) to open Command Prompt.
5. Type the following command into Command Prompt:
net user Administrator /Active:Yes

6. Use the power button on the logon screen to reboot the computer or type shutdown /r into the Command Prompt. The Administrator will then be available from the logon screen.
7. To restore the files back to normal, boot to the Windows install DVD again and open another Command Prompt with Shift+F10. Type the following using the same drive letter as before.
D:
CD Windows\System32
Copy Sethc.exe.bak Sethc.exe
Press Y to confirm the overwrite and close the setup window to reboot. Once you have finished with the administrator and can use another account, disable it again using one of the methods above.

Improve this guide

User forum
0 messages