6 Ways to Check USB Device History on Windows
Apart from using a local network, USB flash drives and hard drives are one of the most convenient ways to transfer data from one computer to another. A huge advantage of USB storage devices is they very rarely need device drivers that are not already built into Windows, so they are truly Plug and Play. However, USB also poses a security risk because someone can easily copy data from your computer just by plugging in a USB flash drive.
For instance, if someone has used your computer in your absence and you want to check if they have plugged in a USB flash drive at any point, it’s not immediately easy to see. Thankfully, Windows does keep a history of all connected USB devices. Besides that, a lot of users and IT professionals are using USB monitoring software to keep systems safe. It’s mainly for the purpose of not having to install the driver each time the device is inserted. If you see a device you don’t recognize, further research is required.
Here are some ways for you to see what USB devices have been connected to your computer and when.
1. USBDeview
NitSoft’s USBDeview is a portable tool that offers tons of information on USB devices that are currently and previously connected to your computer. Unlike the other tools listed here, USBDeView is still actively developed and updated with new functions and features still periodically being added.
If you want to look for connected USB flash drives or external hard drives, sort the list by the Device Type column and look for “Mass Storage” entries. Double click on a listed device to see the date and time of when it was first connected (Registry Time 2) and the last time it was connected (Registry Time 1) to the computer. The dates are also available in the main window if you view/scroll to the right.
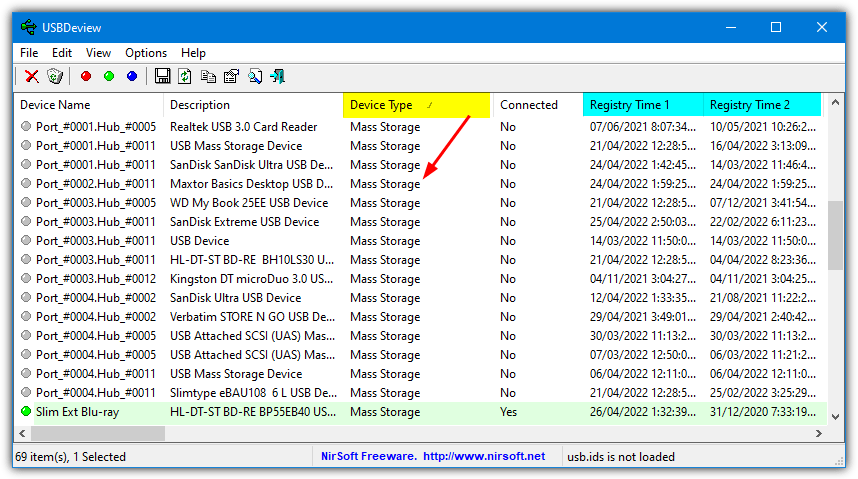
USBDeview can also be used for troubleshooting USB connection problems. Right click on the problematic USB device and select “Uninstall Selected Devices”. Uninstalling the device will clean up the traces so that it can be reinstalled. Other useful functions include creating enable/disable device desktop shortcuts, changing drive letters, disconnecting all devices at once, reloading a USB hub, and viewing remote computer USB data.
2. USB History Viewer
USB History Viewer is a free tool that is designed to show the history of connected USB mass storage devices such as a flash drive or an external hard disk. A possible advantage of USB History Viewer is it also supports other computers on the local network if you provide a valid authentication. The tool is also portable so installation is not required.
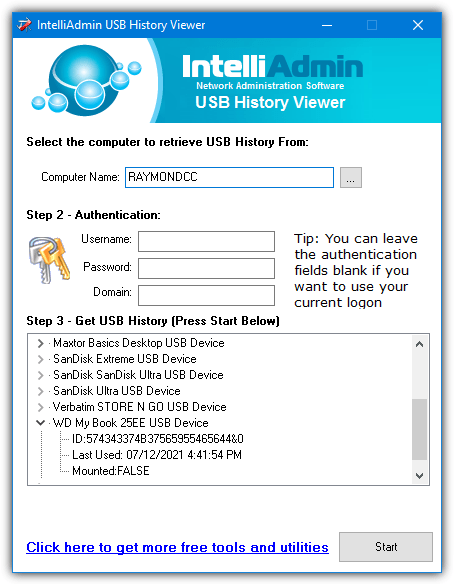
When you first run USB History Viewer, it will default the computer name to LOCALHOST. However, this will not work and you have to add your computer’s name. You will need to either specify your computer name manually or click on the browse button to select your computer from the list (it may take a few seconds). Once you’ve provided the computer name, click on the Start button and the history will be displayed in a few seconds.
3. Small USB History Viewer
Small USB History Viewer lives up to its name as it’s less than 20KB in size and is obviously portable. There are not really any notable features apart from the ability to export the list of devices to a comma delimited text file (CSV).
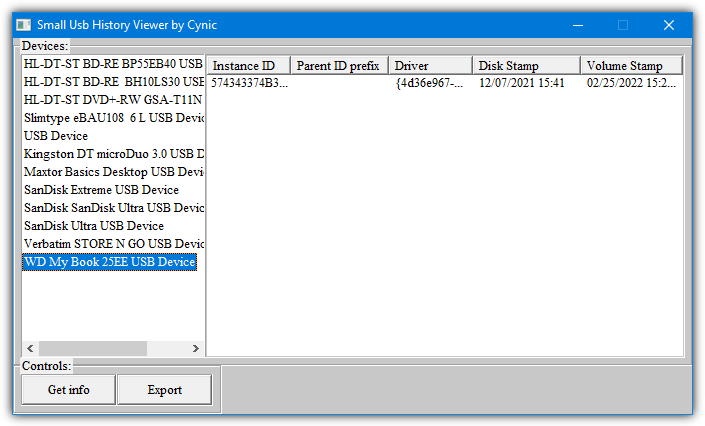
After launching the program, press the “Get info” button. Then double click on any of the devices in the list to populate the table on the right. Not much information is displayed so you probably won’t get much from it. The Disk Stamp column gives you an idea of when the device was first used on the computer but it won’t tell you the last time it was used.
Download Small USB History Viewer
4. Check Previously Connected USB Devices Using PowerShell
A rather simple method built into Windows is listing USB devices using PowerShell. All it does is query the system registry and list all current and previous devices listed in the USBSTOR key. To get a list of more friendly names that will be easy for everyone to read, enter the following in a PowerShell console.
Get-ItemProperty -Path HKLM:\SYSTEM\CurrentControlSet\Enum\USBSTOR\*\* | Select FriendlyName
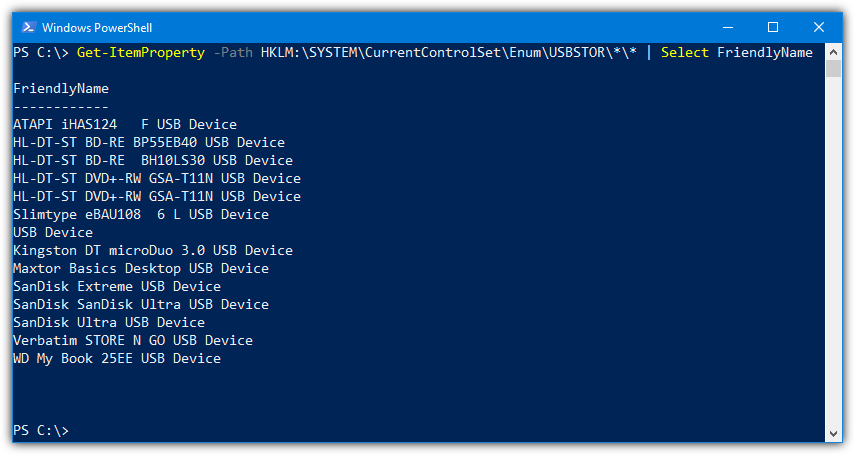
If you want to get a list of device names that might come in more useful for troubleshooting, use a different command.
Get-ChildItem HKLM:\SYSTEM\CurrentControlSet\Enum\USBSTOR | Select PSChildname
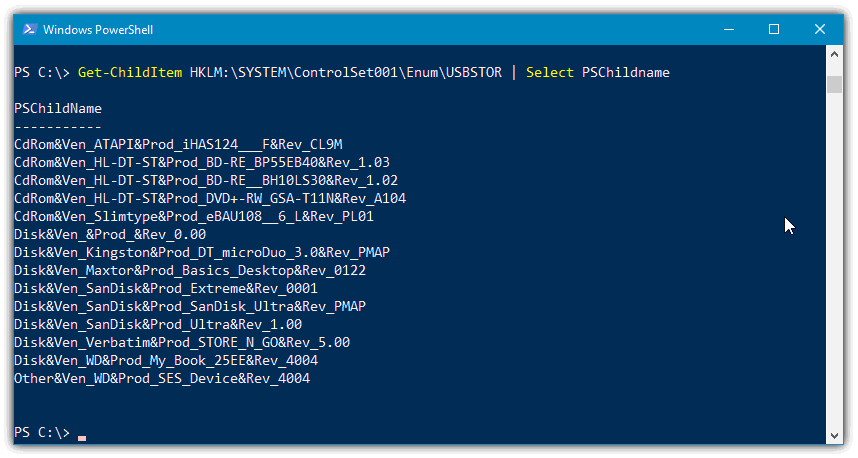
These commands will also show devices that have been previously but are no longer attached to the system.
5. Manually Find USB Devices In The Registry
As we mentioned above, the PowerShell commands query the system registry to gather information about current and previous USB devices. However, you can manually go into the registry yourself and view the same basic data plus more advanced information.
After opening Regedit, navigate to the following registry key:
HKEY_LOCAL_MACHINE\SYSTEM\CurrentControlSet\Enum\USBSTOR
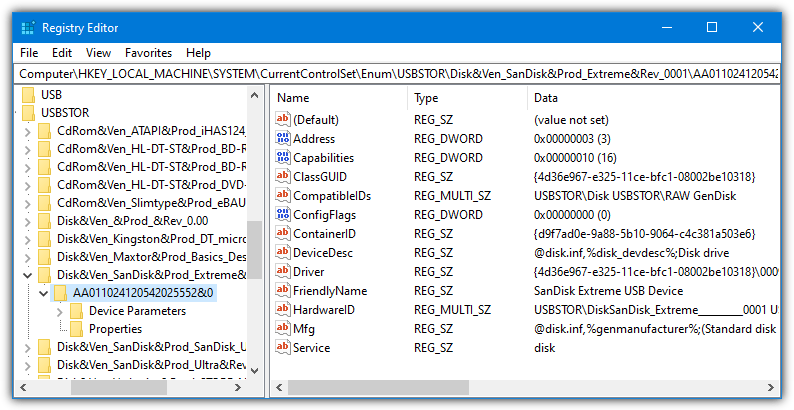
This key will list all devices using their long name IDs, expand any of the keys and click on the subkey (which is the device serial number). More information, such as the aforementioned friendly name, will be available.
6. Finding Out When USB Devices Were Inserted or Ejected
In addition to finding the names of USB devices like flash drives that have been previously connected to your computer, it might be useful to see the times and dates when they were attached to the system. The Windows Event log will offer some help here as it records the time and date of USB device and driver activity. The first tool, USBDeview, can display some connected dates but not as many as the event log.
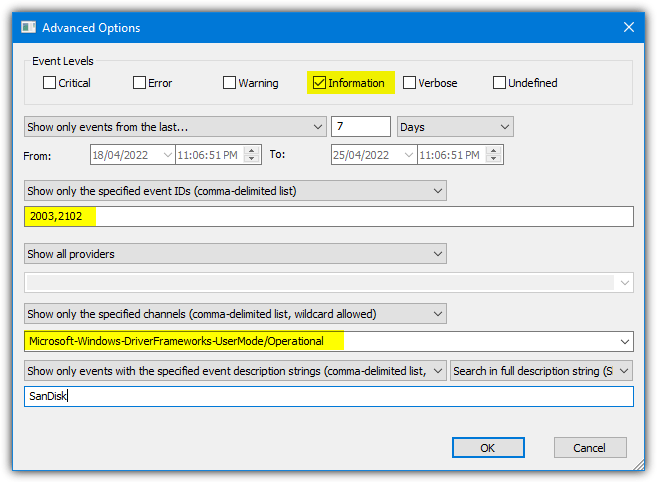
Although the Windows Event Viewer could be used for this task, we found the developer of USBDeView, Nirsoft, has another tool called FullEventLogView that is easier to use. After launching FullEventLogView, press F9 or go to Options > Advanced Options to configure a filter to show only the data required. Edit the following values in the window:
Event levels – Check only information
Date/Time – Optionally change from the last 7 days to a date range of your choice
Show All Event IDs – Change to “Show only the specified event IDs” and enter “2003, 2102” into the box
Show All Channels – Change to “Show only the specific channels” and select “Microsoft-Windows-DriverFrameworks-UserMode/Operational” from the list
Show all events with any event description string – This can be used to narrow down the listed devices. For example, “Sandisk” will display the insert and eject events for only SanDisk devices.
When you see the results, entries with an Event ID of 2003 will be when the device was inserted, and 2102 will show two entries when it was ejected.
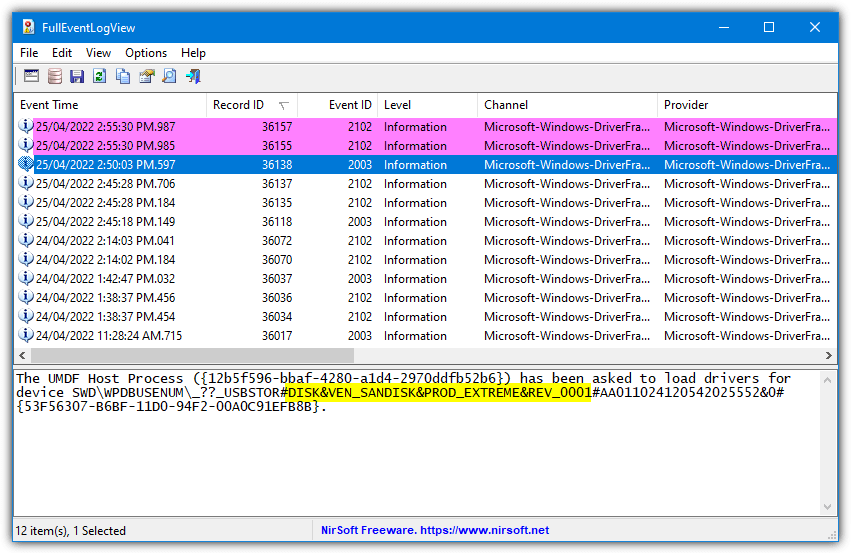
As we can see from the image above, among several other SanDisk device inserts and ejects, a Sandisk Extreme Flash drive was inserted at 2:50 PM (Event ID 2003) and then ejected five minutes later (Event ID 2102).
It’s possible to use other Event IDs to help get some information on when a drive was inserted. These IDs will also better help with identifying USB hard drive activity. The changes from the above settings are as follows.
Show All Event IDs – Change to “Show only the specified event IDs” and enter “400,410” into the box
Show All Channels – Change to “Show only the specific channels” and select “Microsoft-Windows-Kernel-PnP/Configuration”
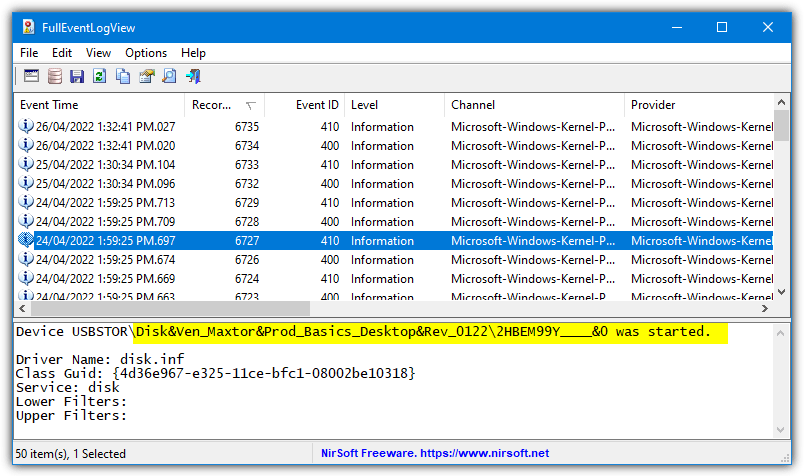
An alternative method would be to simply enter a search string of a possible known inserted USB drive and search the entire event log. While this is obviously more complete in terms of shown information, it will take quite a while to search and might show too much data for all but the most diligent users to look through.
Thanks for sharing the information this will really helpful for me.