2 Ways to Make Apple iTunes Portable
If you are an iPhone or iPod user, one of the most important pieces of software that you need to install on your personal computer running Windows is iTunes. There are quite a number of features that can be found in iTunes and the most important feature is probably the ability to create a full backup of your iPhone. Other than that, iTunes is also a media player that allows you to play audio and video files, create and organize playlist, listen to Apple music and many more.
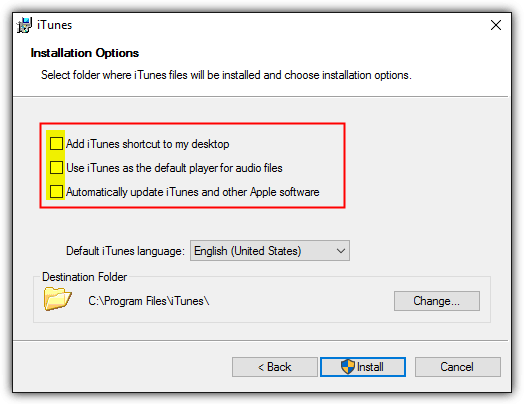
As useful as it is, some users find iTunes software to be annoying because when you install iTunes on a Windows system, it also installs additional startup items such as the iPod Service (iPodService.exe), Bonjour service (mDNSResponder.exe), Apple Mobile Device service (AppleMobileDeviceService.exe) and iTunesHelper (iTunesHelper.exe). If you’re not careful during installation, you may have even allowed iTunes to be the default player for audio files on your computer.
It may be a good idea to use a portable iTunes instead so that Windows can continue to run without all those unnecessary process belonging to iTunes which run automatically when your computer is booted up. Unfortunately due to Apple’s restrictive license terms, they do not allow an unofficial portable version of iTunes which is why you cannot find a legal download site that host iTunes portable. You can however attempt to make your own iTunes portable for personal use at your own risk.
iTunes is not a simple application that comes in just one executable file that can be easily made portable. Therefore, many application virtualization programs like Cameyo, Enigma Virtual Box, BoxedApp Packer, Evalaze, InstallAware Virtualization and JauntePE fail to create a working portable iTunes. Running the portable iTunes created by the software mentioned above will show an error “iTunes was not installed correctly. Please reinstall iTunes. Error 7 (Windows error 193)”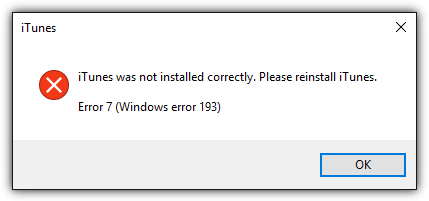
So far we’ve only managed to successfully create a working portable version of iTunes using VMware ThinApp and Turbo Studio. Here are the steps if you’re interested in creating your own portable iTunes. Do take note that it is best to perform the steps below in a newly fresh installed Windows operating system that is fully up to date.
Make iTunes Portable with Turbo Studio Express
Originally known as Xenocode, then renamed to Spoon and now to Turbo Studio. If you’ve used any of the previous versions, you will find that the graphical user interface familiar as it is pretty much the same except re-branded. Turbo Studio Express is the free version of Turbo Studio that allows you to create portable applications for personal use. Simply follow the simple steps below to create your own iTunes portable with Turbo Studio Express.
1. Sign up for a free Turbo Studio account. A temporary password will be emailed to you so make sure you’ve entered a valid email address during registration.
2. Download Turbo Studio Express and run it. The program takes a while to load because you’re running an application that is over 200MB in size.
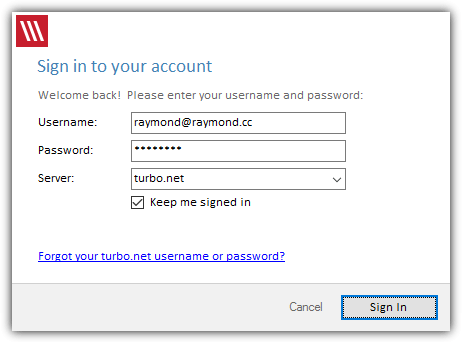
3. You’ll need to enter your username and password that you’ve used to sign up for the free Turbo Studio account.
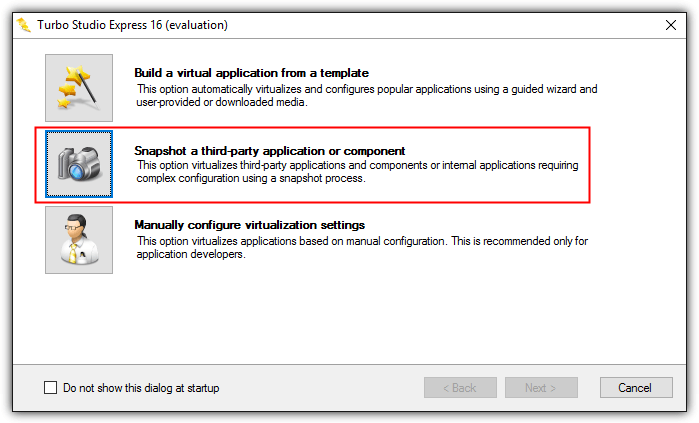
4. When a window with three options appears, select the middle option that says “Snapshot a third-party application or component” and click Next.
5. Turbo Studio Express will inform you that the next step is to capture a “before” snapshot. Click Next to continue.
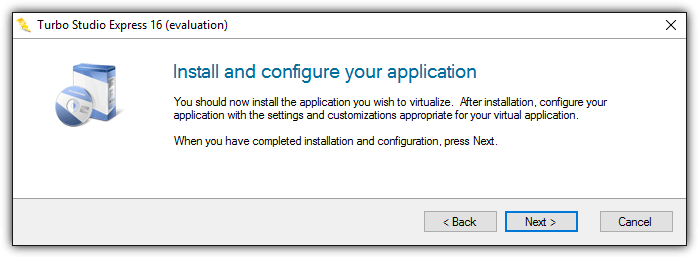
6. When you see a window like the screenshot shown below that tells you to install and configure your application, you can now run the iTunes installer and leave the Turbo Studio Express window open the way it is. If you haven’t downloaded the iTunes installer, you can do so by clicking here.
7. When installing iTunes, it is advisable to untick all 3 checkboxes at the installation options.
8. After you’ve finished installing iTunes, go back to the Turbo Studio Express window and click the Next button.
9. Turbo Studio Express will now capture another snapshot to compare it with the first snapshot that was created before installing iTunes. Click Next to continue. When asked to browse for a folder to copy the items included in the filesystem snapshot, simply select a path such as Desktop where you have write access to.
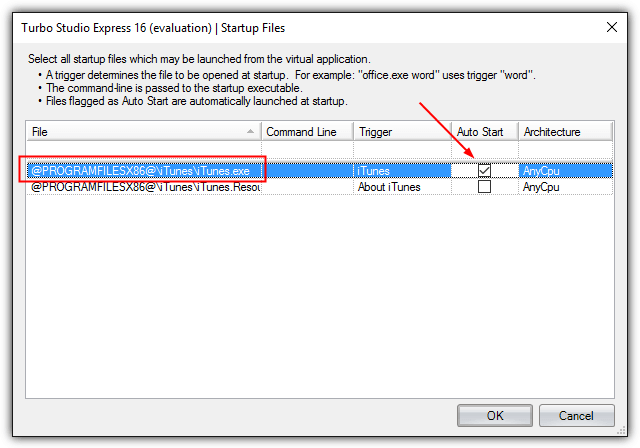
10. When Turbo Studio Express asks to select a startup file, click the Multiple button, tick the Auto Start checkbox for iTunes.exe and click OK.
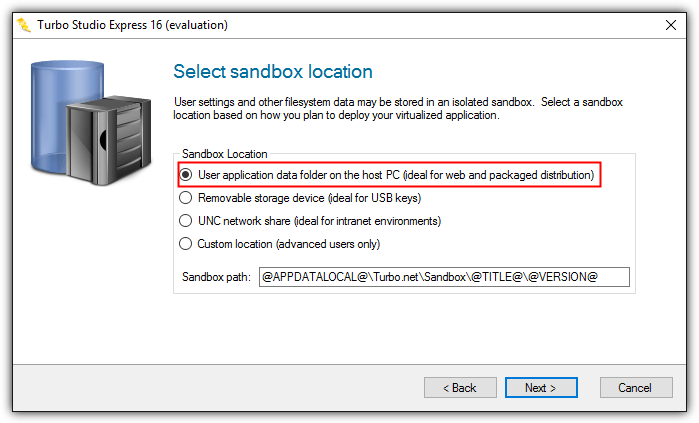
11. For selecting a sandbox location, you can choose the first option which is the default selection and click Next to continue.
12. When it’s finished, make sure to untick the “Publish the virtual application now” checkbox and click Finish. If you don’t untick the option, the program will automatically upload the portable iTunes to your personal Turbo Studio account which is a few hundred MB in file size that can take a while to complete if you have a slow upload connection speed.
13. Now you should be back at the main Turbo Studio Express application. At the top right of the program, click the “Publish to Local Repository” button to start building the portable iTunes.
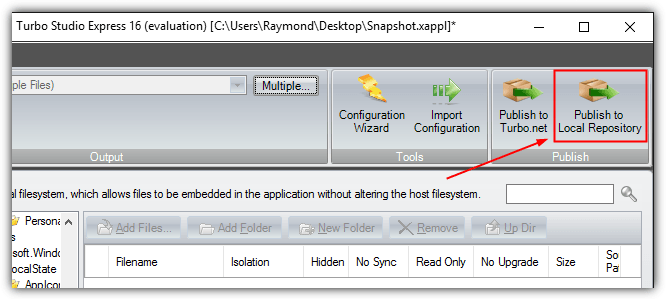
14. You’ll have to choose the location where you want to save the output file, enter a name such as iTunes at the Image Properties window, and finally click the Finish button when the publish is successful.
After successfully creating a portable iTunes, you should be able to run it but you’ll soon encounter a problem when you connect your iPhone to the computer. iTunes will report two different errors which are “Apple Mobile Device service could not be started because an unknown error occurred” and “This iPhone cannot be used because the Apple Mobile Device service is not started“.

To solve this problem, you will have to install Apple Application Support and Apple Mobile Device Support. These two applications can be found in iTunes installer and you can use 7-Zip archiver to extract. Right click at the iTunes installer file, go to 7-Zip and select “Open archive“. You should see 5 .msi files and one .exe file in 7-Zip. You will only need to run AppleApplicationSupport.msi and AppleMobileDeviceSupport.msi to install the required files to support your iPhone.
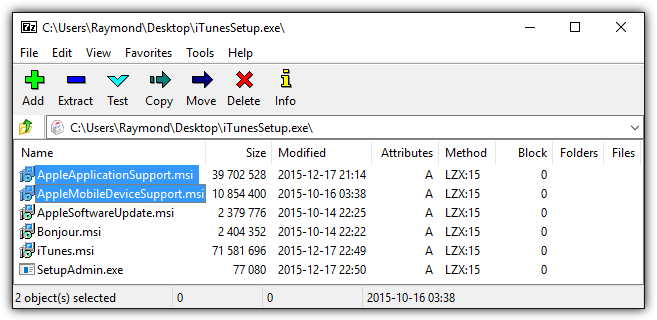
Do take note that iTunes portable will still complain about the missing services after installing both of the MSI files but you will notice that your iPhone can be synced with the portable iTunes.
Make iTunes Portable with VMware ThinApp
Previously known as Thinstall and later renamed as ThinApp after being acquired by VMware, it is one of the best portable application creators with an exceptionally high success rate up to 90-95% in packaging applications. ThinApp is a shareware but the official VMware website does not display the price if to be purchased as a standalone product. If you have a license for ThinApp, you can definitely use it to make your own iTunes portable.
1. Download VMware ThinApp and install. You’ll need to create a free account and register to download your 60 day ThinApp trial.
2. After installing ThinApp, run ThinApp Setup Capture from the start menu. Click the Next button.
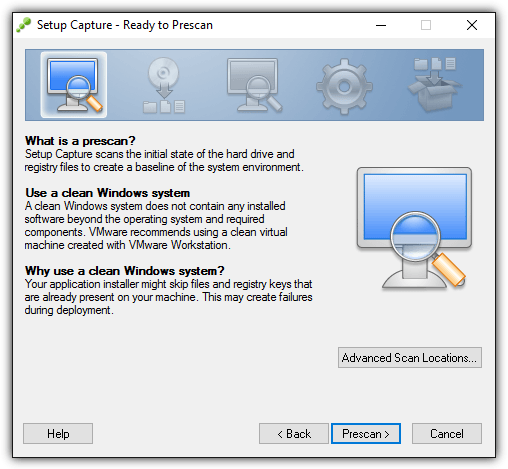
3. Click the Prescan button to start the initial scan to create a baseline.
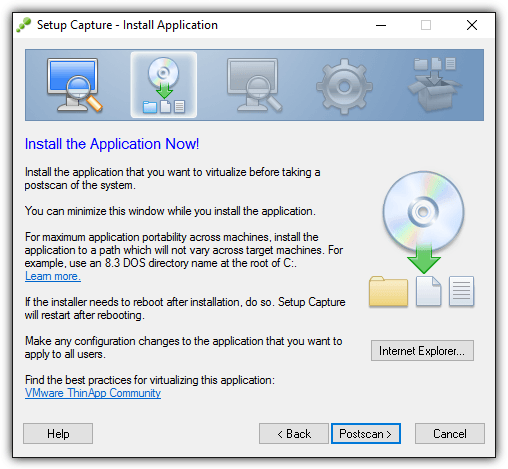
4. After it’s finished pre scanning and ThinApp tells you to install the application now, you can start installing iTunes. Remember to uncheck all 3 checkboxes in iTunes installation options.
5. When iTunes has completed installing, go back to ThinApp and click the Postscan button.
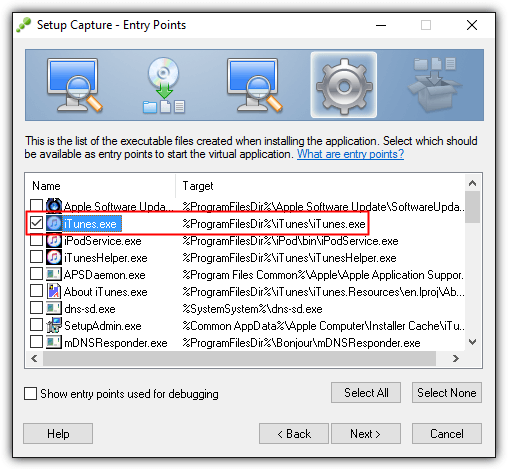
6. After postscan, ThinApp will compare the two snapshots and you will be asked to choose entry points which is the main executable file to run. Simply uncheck all of them, select only “iTunes.exe” from the list and click Next.
7. Click Next to skip the VMware Workspace option.
8. The “Everyone” option is the default selected option for the group authorized to run this package. Click Next.
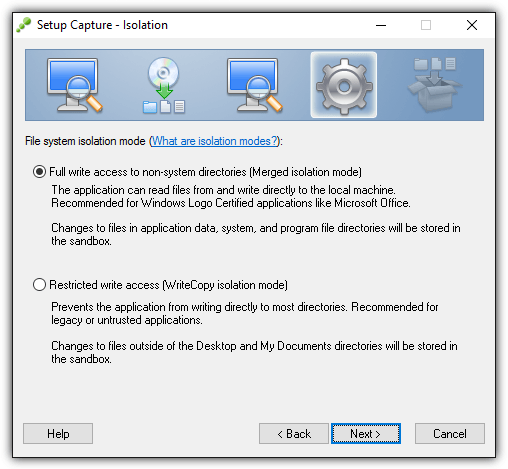
9. Ensure that the first option “Full write access to non-system directories” is selected for isolation mode or else you won’t be able to backup your iPhone to your computer.
10. For sandbox location, use the first default option “User Profile” and click Next.
11. The next step is sending anonymous usage statistics to VMware. This option is up to you and choosing either one will not change anything for the iTunes portable that you’re building.
12. Leave the inventory name as iTunes and click Next.
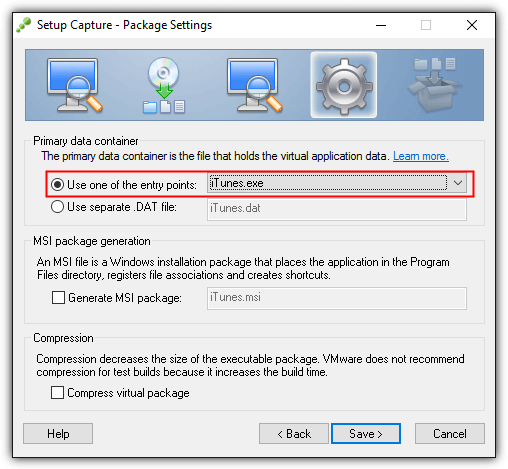
13. For primary data container, the default selection is using a separate .DAT file to store the virtual application data, but you can also choose the first option which is iTunes.exe. The first option will build a single executable file, while the second option will have 2 files which is EXE and DAT.
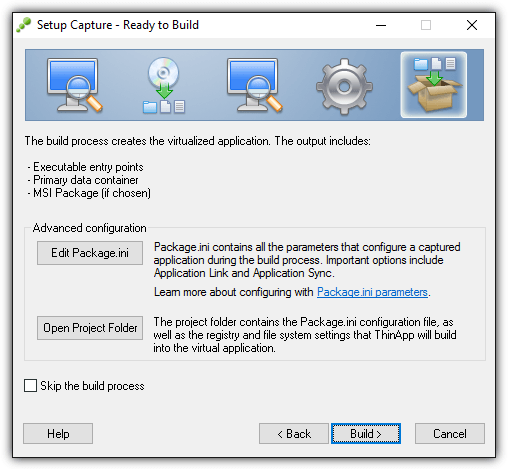
14. The final step is the click the Build button. After ThinApp has finished building your portable iTunes, a folder containing the files will automatically open.
Additional Notes: Similar to the portable iTunes created with Turbo Studio Express, you will also need to install AppleApplicationSupport.msi and AppleMobileDeviceSupport.msi files extracted from the iTunes installer file to support your iPhone.

I’d say, don’t waste your time unless you really know you can hack this. The first app didn’t start, complaining about “Non-standard characters in file path” upon start up even though I installed it in the default path. ThinApp-created portable apps expire after the 60 day trial is over and won’t start. Plus i my app took up 2.5GB and didn’t even launch iTunes after all that trouble.
Hi Raymond, I agree in regards to iTunes bloating the computer, although there is an alternative way to manage your iPod products without iTunes, you can see my post I wrote a little while back regarding the matter:
All the best, Peter.
thank you so much , this is a real nice work , i hate itunes so much :)
This tips may come in handy. Thanks for the head up ray.
Smart! :>
Thanks for sharing this VERY useful information. I’m in the same boat as you and most probably many other people. As we all know, it is “the Apple way, or the highway” My main music application is FB2K with iPod plugin. I would not change it for anything, it just works. However, if you have iPhone then iTunes it is a must have. It would be nice if you can upload the portable version that you have created so we can use it as well. Thanks in advance.